In the article Field Growing it was established that for a thick trunked bonsai, the tree must first be allowed to grow freely in the ground or a pot to help thicken the trunk.
Having thickened the trunk by allowing free growth for a number of years, it is unlikely that the trunk have much taper and will often lack any movement.
There are a number of ways of introducing taper and movement to a field grown trunk; this article describes one method that is known to be widely used in Japanese growing fields to ‘build’ myogi or informal upright trunks for bonsai. This process can equally be applied to a collected or nursery tree that is currently too tall for use as a bonsai and needs to be reduced in height.
By studying the following images, it is hoped that the reader will understand and use some of the techniques described to introduce taper and movement in the trunks and new branches for their trees.
This method is intended for deciduous trees only but some of its principles can be applied to coniferous species.
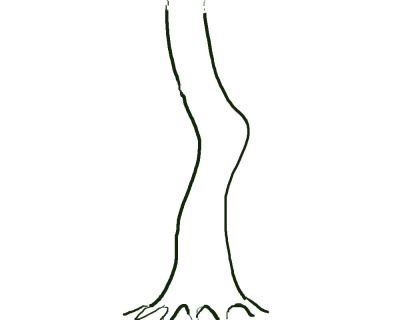
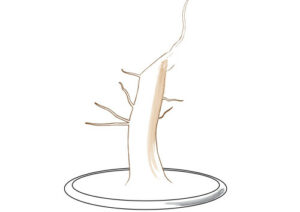
Image 1 shows the lower portion of the trunk of a tree growing in the ground. its girth is adequate for use as a bonsai but there is little movement or taper.
Ideally, the finished bonsai will be approximately 6 times the height of the trunk diameter. The diameter of this trunk is 3″ so the ideal height of the tree when it is finished will be 18″. If a taller bonsai is required, this tree will need growing on for further years before this process begins. Once the trunk has been chopped, it will barely thicken until the new section above it has all but reached the same girth and at which point, taper is all but lost. Refer to this article for an example
So the projected final height of this tree will be 18″. The first branch should be at approximately a 1/3 of the overall height. This means that the first branch should be 6″ from the base of the tree.
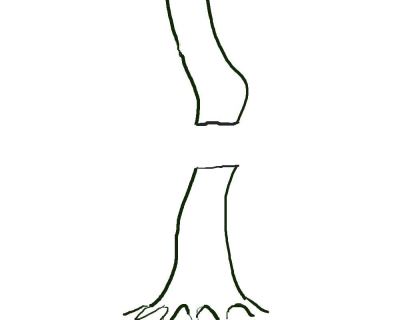
Image 2. Late Winter/early Spring. The trunk is chopped with a straight cut at a height of around 12″, approximately 2/3 the height of the finished tree. If additional movement is required on a very straight lower trunk, the chop can be made at 6″ or 1/3 of the height of the tree.
A straight cut reduces moisture loss and potential dieback; until a new shoot has appeared and been chosen as the new leader, there is no point in making a diagonal cut as is sometimes advised. As with all cuts, the chop should be sealed with cut paste.
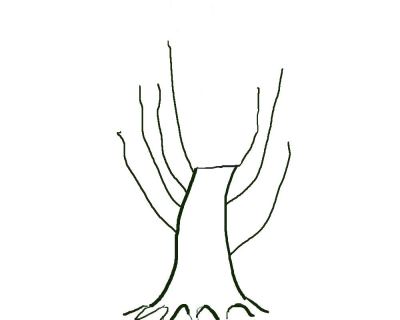
Image 3. Autumn. The tree drops its leaves and reveals the effects of a growing season left to grow freely. The heavy chopping has resulted in strong budding from all over the trunk.
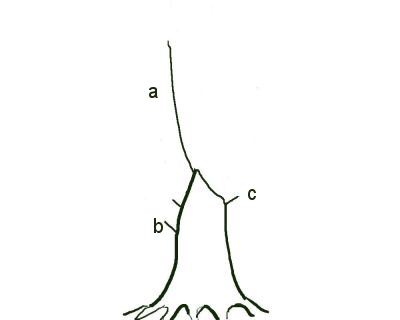
Image 4. Autumn or Spring. (I prefer to carry this work out on deciduous trees immediately after leaf drop but it can equally be carried out in Spring before bud break).
The shoot a is chosen to be the new section of the trunk. It is left unpruned to accelerate its thickening which in turn will help to heal the scar caused by the trunkchop. The trunkchop can be tidied up into a diagonal cut now or left until mid Spring at which point it will heal faster.
Shoot b will be the first branch. Along with the other shoots that are retained, it is pruned back to 1 or 2 nodes or leaf joints. Pruning the future branching back this hard begins the process of building taper and natural movement to the branching. It also promotes further backbudding from the trunk the following Spring.
Shoot c will be the second branch and will be positioned on the outside of the trunk’s bend to the left. It s growth will also help promote healing of the scar at the base of the trunk chop. For trunk that has been chopped to a third of its projected final height, c will be the first branch and b can be removed.
At all stages of development, when selecting which shoots to retain. Look for those that have short internodes. Branches will only occur from nodes, the closer the nodes (leaf joints) are now, the easier branch placement will be in the future.
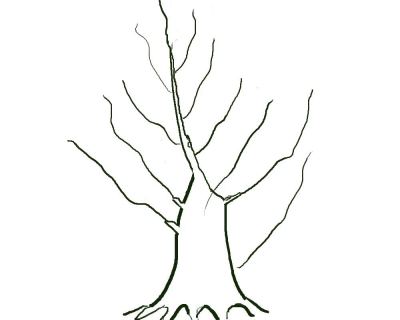
Image 5. Autumn. After one or more growing seasons of free growth, the tree has produced many new shoots. The new trunk leader, left unpruned previously has now started to thicken and introduce taper to the trunkline. It has also produced new shoots of its own that can be used to change the direction of the trunk.
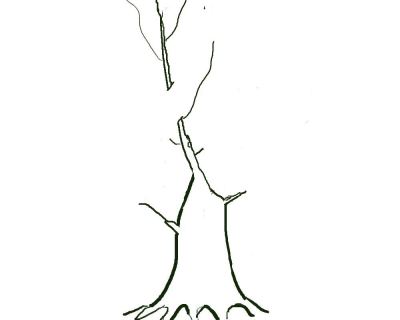
Image 6. Autumn or Spring. The first and second branches (b and c) are pruned back hard, leaving just 1 or 2 nodes or leaf joints from the new growth.
The new trunk built from shoot a is chopped back to a secondary/sub branch. This changes the direction of the trunkline back towards the right and introduces a second pronounced change in taper.
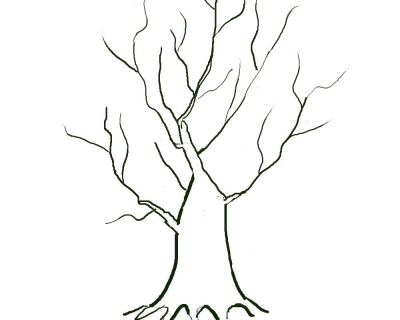
Image 7. Autumn. Another one or more seasons of growth have finished. The third section of the trunk has now become established and has its own sub branches.
The first branches (b and c) also have 3 sections of taper and secondary branches that are noticeably thinner.
The tree can be developed further in the ground for a number of years to exaggerate taper and movement or can be lifted and placed into a bonsai pot to start the development of the fine outer twigs on the very outside of the tree.
It is important to understand that the longer the period between each of the following stages, the greater the taper created. Trees that are trunk chopped to a new leader on an annual basis will have less but more ‘natural’ taper. (Sometimes known as a ‘faraway view’, a heavily tapered bonsai being said to have a ‘near view’)
Do not try to ‘speed up’ the process of creating taper by cutting back within a season; any growth that follows pruning within the same growing season or vegetative period, will be of the same thickness.