.jpg)
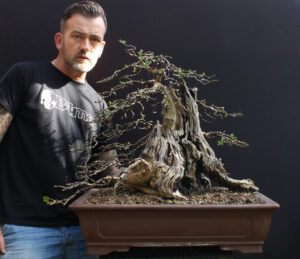
June 2015: I first had the pleasure of seeing this European Larch in early June in the garden of my student Alex. He had acquired it from the collection of an experienced enthusiast who had kept it alive in a pot for many years.
I instantly fell in love with the old, cracked bark, the exposed roots and the movement in the first branch, but felt that the tree would greatly benefit from being reduced in height. At this point in time, the tree was over 24″/60cm tall and I felt that a reduction by 50% would create a far more powerful tree.
.jpg)
Before airlayering the Larch bonsai.
A few days later and Alex brought his Larch to my garden so we could begin the process of styling it. Rather than simply chopping and removing the top and right hand sections of the tree, we decided to try to airlayer them to create new trees in their own right.

The newly created airlayers on the Larch bonsai.
Alex cut a wide ring-bark around each section to be rooted prior to wrapping with sphagnum moss and plastic to create the airlayers. (The process of airlayering is described in detail elsewhere on this website). Our hope was that new roots would appear before the end of the growing season and we would be able to separate the new trees.
I then wired, shaped and positioned the heavy remaining lower branch of the ‘parent’ tree so that Alex could begin to develop the final design while the airlayers rooted.
.jpg)
The rooted Larch airlayer.
September 2015: 3 months later, Alex brought his tree back to my garden for us to complete the work. One of the airlayers had produced plenty of fleshy red-tipped white roots and was ready to be separated and planted into its own pot.
.jpg)
Alex with the separated airlayer.
We sawed through the base of the airlayer to remove it from the parent tree and then planted it into its own pot. After some discussion we then decided to separate the second airlayer; on inspection we found that the although the tree had no roots, it had calloused well.
Eager to finish styling the parent tree, we planted the second tree into its own pot in the hope that such drastic action would prompt the callous into rooting immediately. From experience I have learned that is a common occurrence, albeit risky.
Our next problem was to dress the remaining chops/wounds at the top of the parent tree. We had the option of either removing the stumps entirely or turning them in deadwood features.
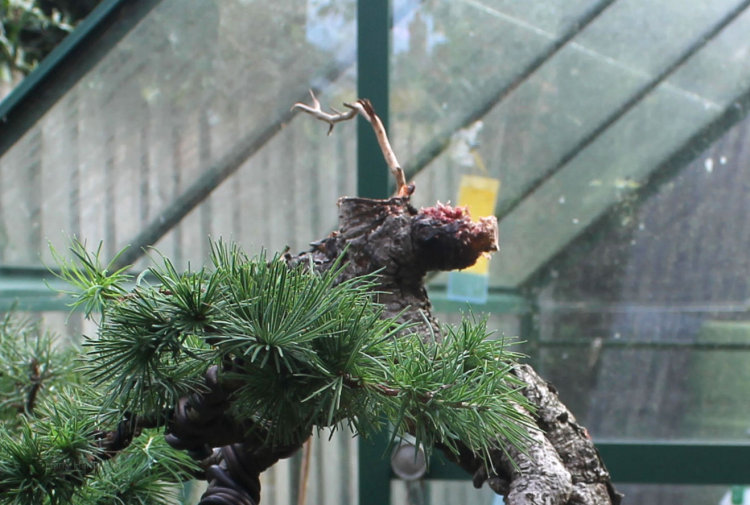
The two stumps at the top of the trunk.
We decided that although Larch callous strongly and would heal over what would be a large 5cm+ diameter wound within a few years, it would be preferable to create a jin that would compliment the character of the bonsai itself.
.jpg)
The two stumps after carving.
The two stumps were stripped of bark and thick Larch cambium before being carved. Using a Dremel carving machine with various carving bits and wire brushes, we were able to create one right-facing jin.
.jpg)
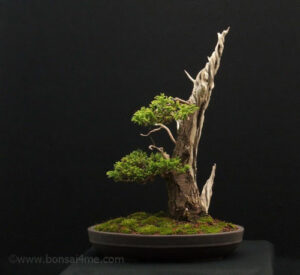
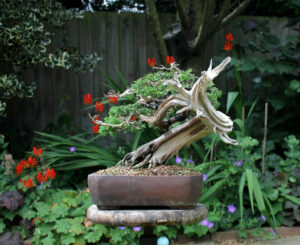
Larch (Larix europea) bonsai after completing styling. Height 12″/30cm.
The styling of the Larch was complete. However, with this tree, we found that Alex is lucky enough to have a large number of alternative front views!
.jpg)
.jpg)
.jpg)
.jpg)
.jpg)