Before Removing The Bonsai From Its Current Pot
Before you begin the process of repotting, it is always worth preparing the materials that will be needed, as time spent looking for materials during the course of repotting will prolong the amount of time the roots are exposed to the air. Ensure that the following materials are to hand; sufficient good quality bonsai soil, tools, drainage mesh and wire. If a new pot is to be used for the repotting, prepare the pot.
This English or Field Elm/Ulmus minor bonsai has been developed by me for nearly a decade. Healthy Elms have very vigorous root-growth and require regular repotting, every one to two years. They are also capable of tolerating very aggressive rootpruning, more so than many other deciduous tree species.
Preparing The Pot
If using a new pot, this procedure can be carried out before the tree is lifted from its old pot. If the old pot is to be retained, it will need to be thoroughly cleaned with water and prepared after the tree has been removed. ‘Butterflies’ are shaped from bonsai wire and are used to hold plastic mesh in position over the drainage holes.
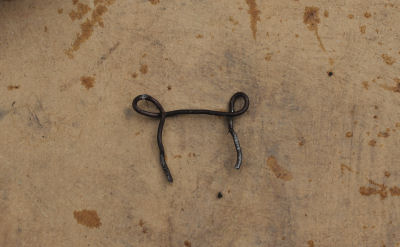
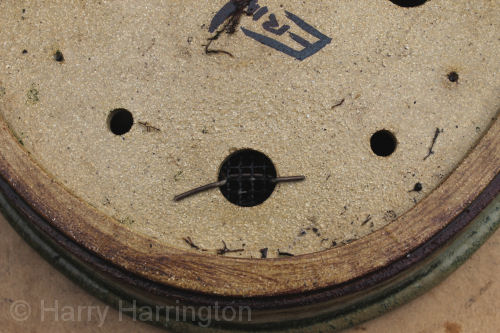
A length of wire shaped into a ‘butterfly’ to hold the drainage mesh in place. The two ‘tails’ of the wire butterfly are threaded through the mesh and drainage hole and then pushed back against the bottom of the pot so that they grip tightly.
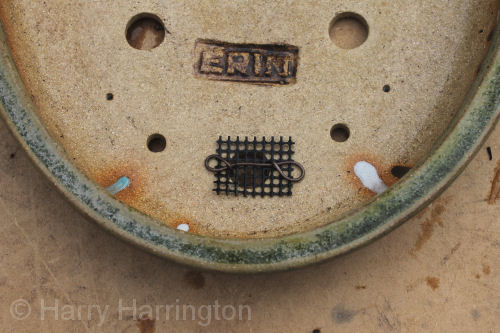

Plastic mesh is used to cover the drainage holes of the pot, stopping the soil medium from falling through the drainage holes. Here the drainage mesh can be seen on the inside base of the pot, secured into position by the wire butterfly.
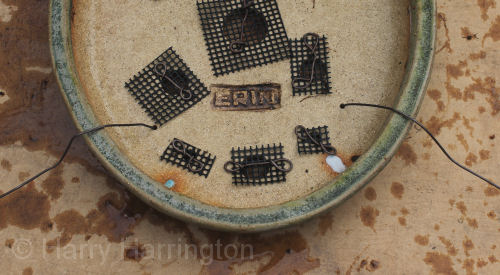
Lengths of aluminium or copper bonsai wire are then threaded through the drainage holes, or wire-holes if they are provided, in a loop. These are used for anchoring the tree into position once it has been planted into the bonsai pot. This is an important part of the repotting process and should not be forgotten. Bonsai that are not firmly anchored into their bonsai pot are at risk of being blown over in strong winds and are liable to damage if the tree is moved around, at least until the rootball has grown significantly and secured itself within the pot. In either event, damage to young roots and therefore the tree itself, is likely.
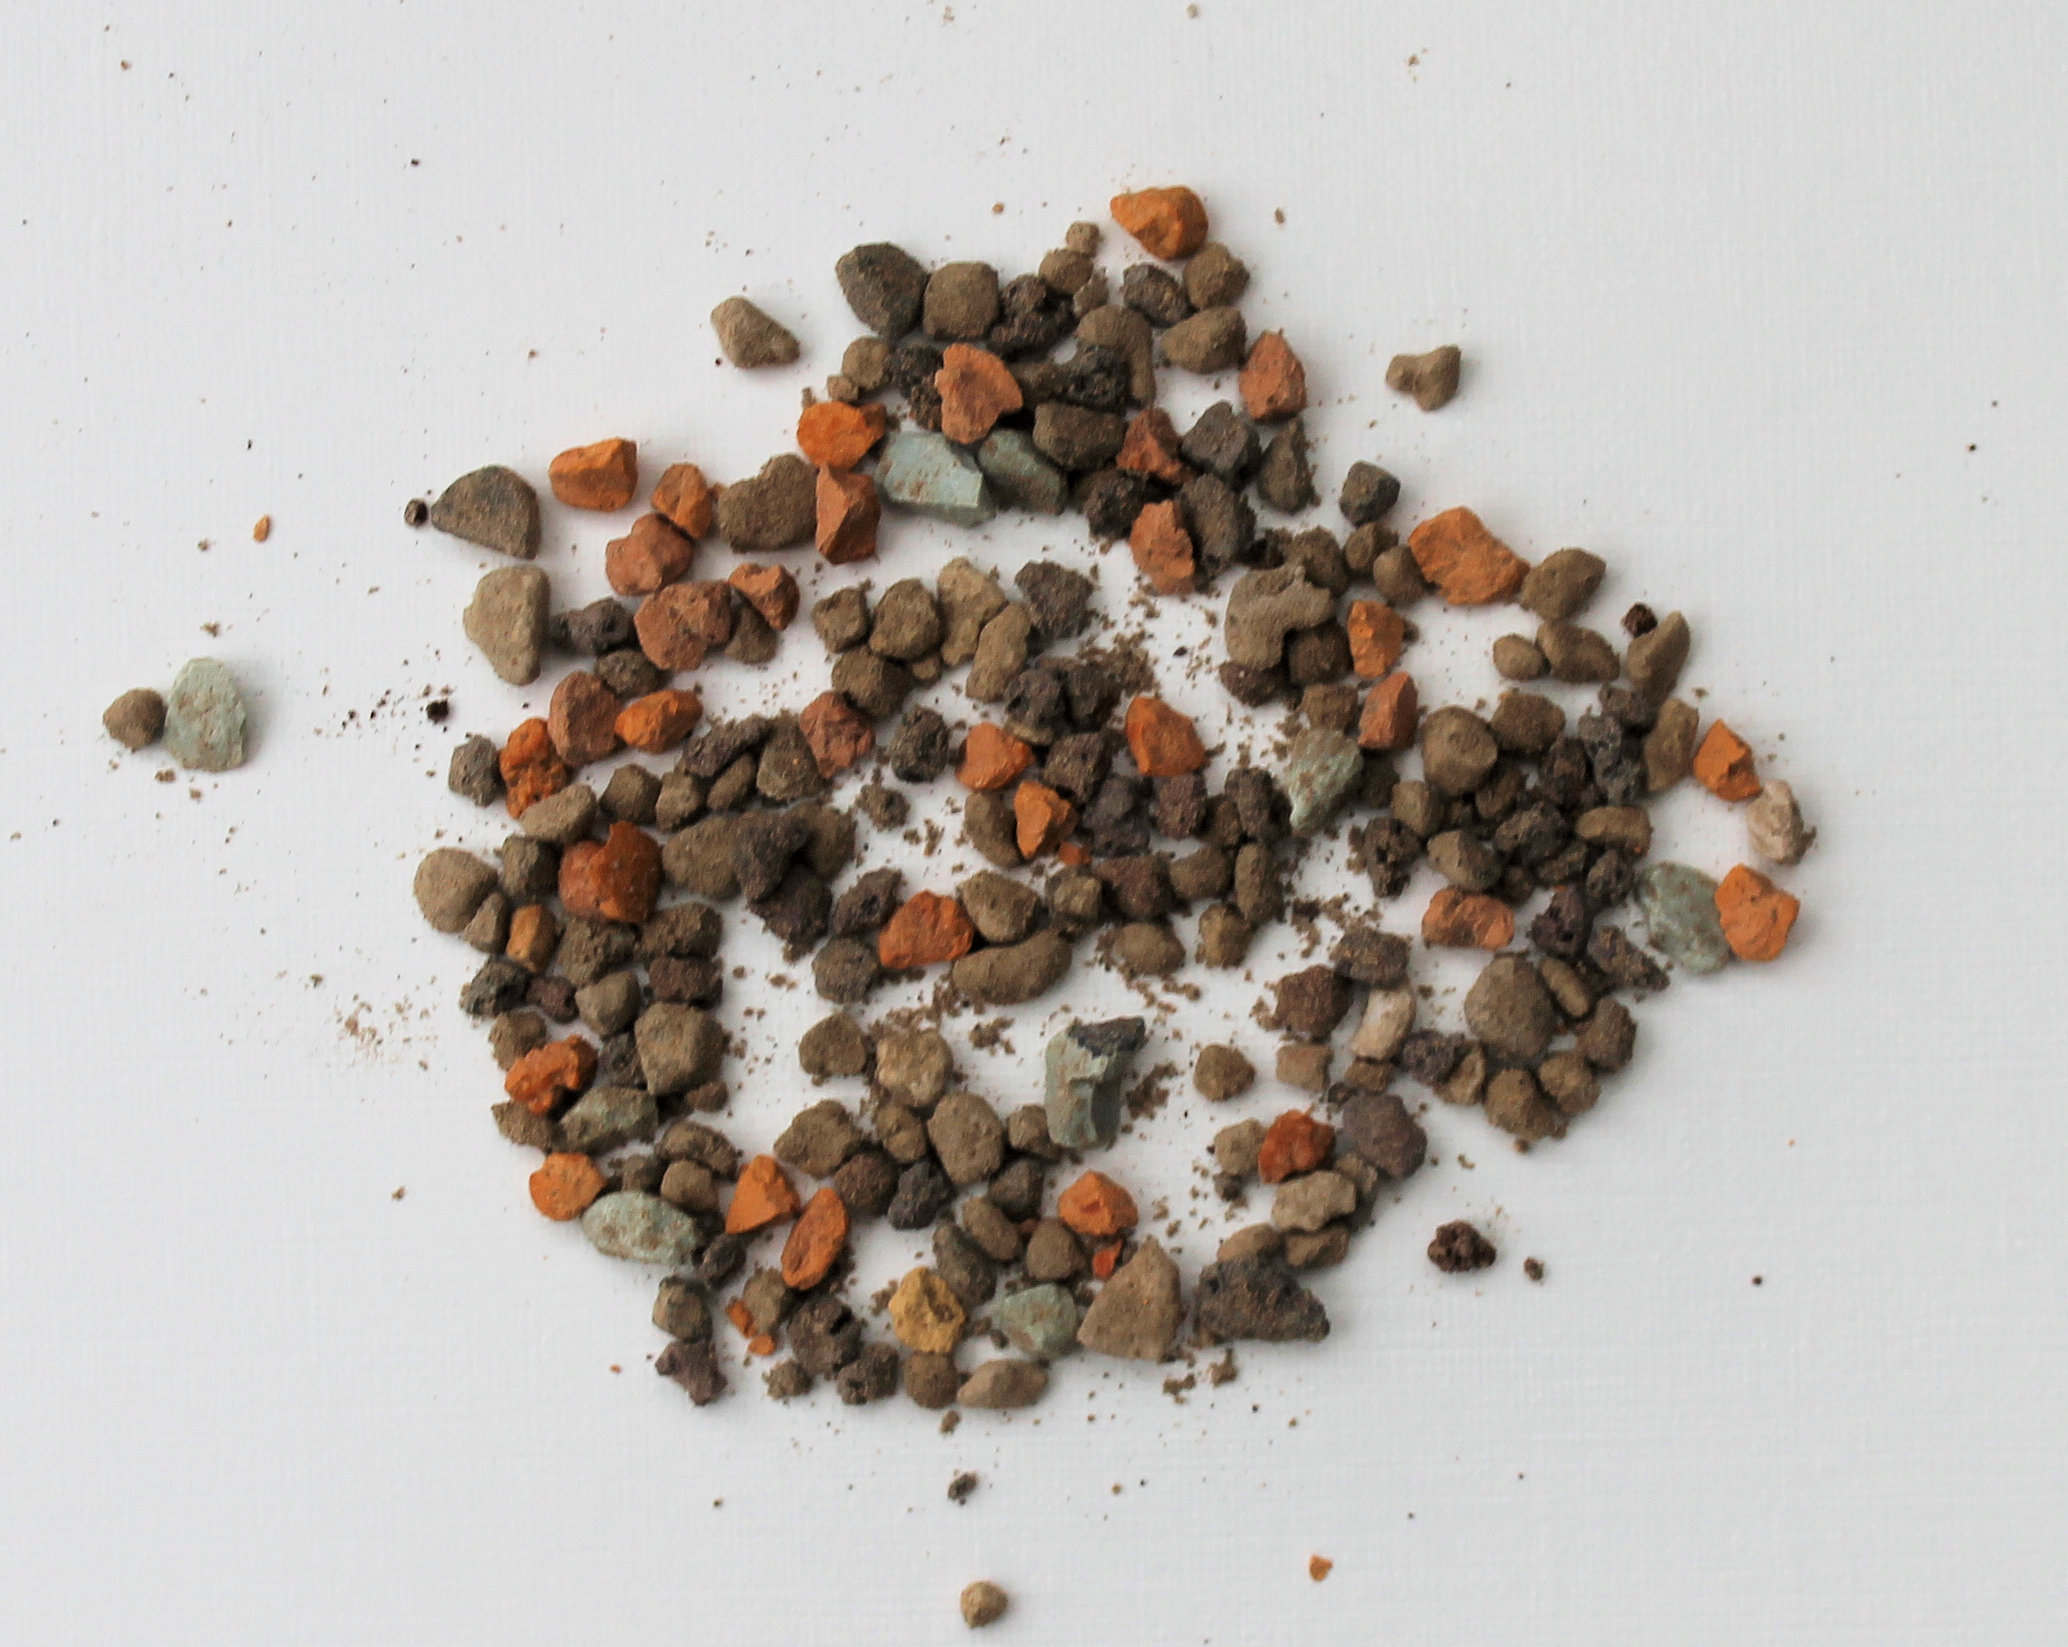
Preparing New Soil For Repotting
There are a very large number of soil mixes that are suitable for bonsai. Indeed, it is a hotly debated subject within bonsai-circles as choosing the right soil-mix for your tree and climate is of the utmost importance.
It should be noted that it is essential that the soil that is used is free-draining and does not compact easily. Never use garden soils or ordinary potting compost as they are not adequate for bonsai cultivation.
Removing The Tree From Its Pot
Cut the tying-in/anchor wires from underneath the pot and tilt the tree out. If the tree is reluctant to come out, tap the sides of the pot with your hand to try and separate the soil from the edges. If this fails to work, run a sharp knife along the inner edges of the pot to release the rootball. Gently, lift the tree and inspect the rootball.
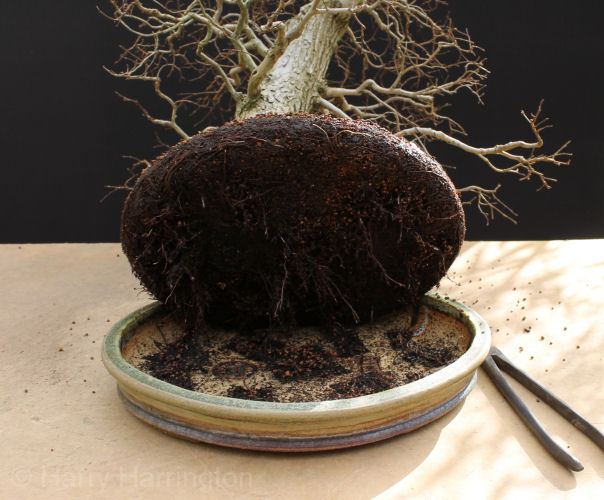
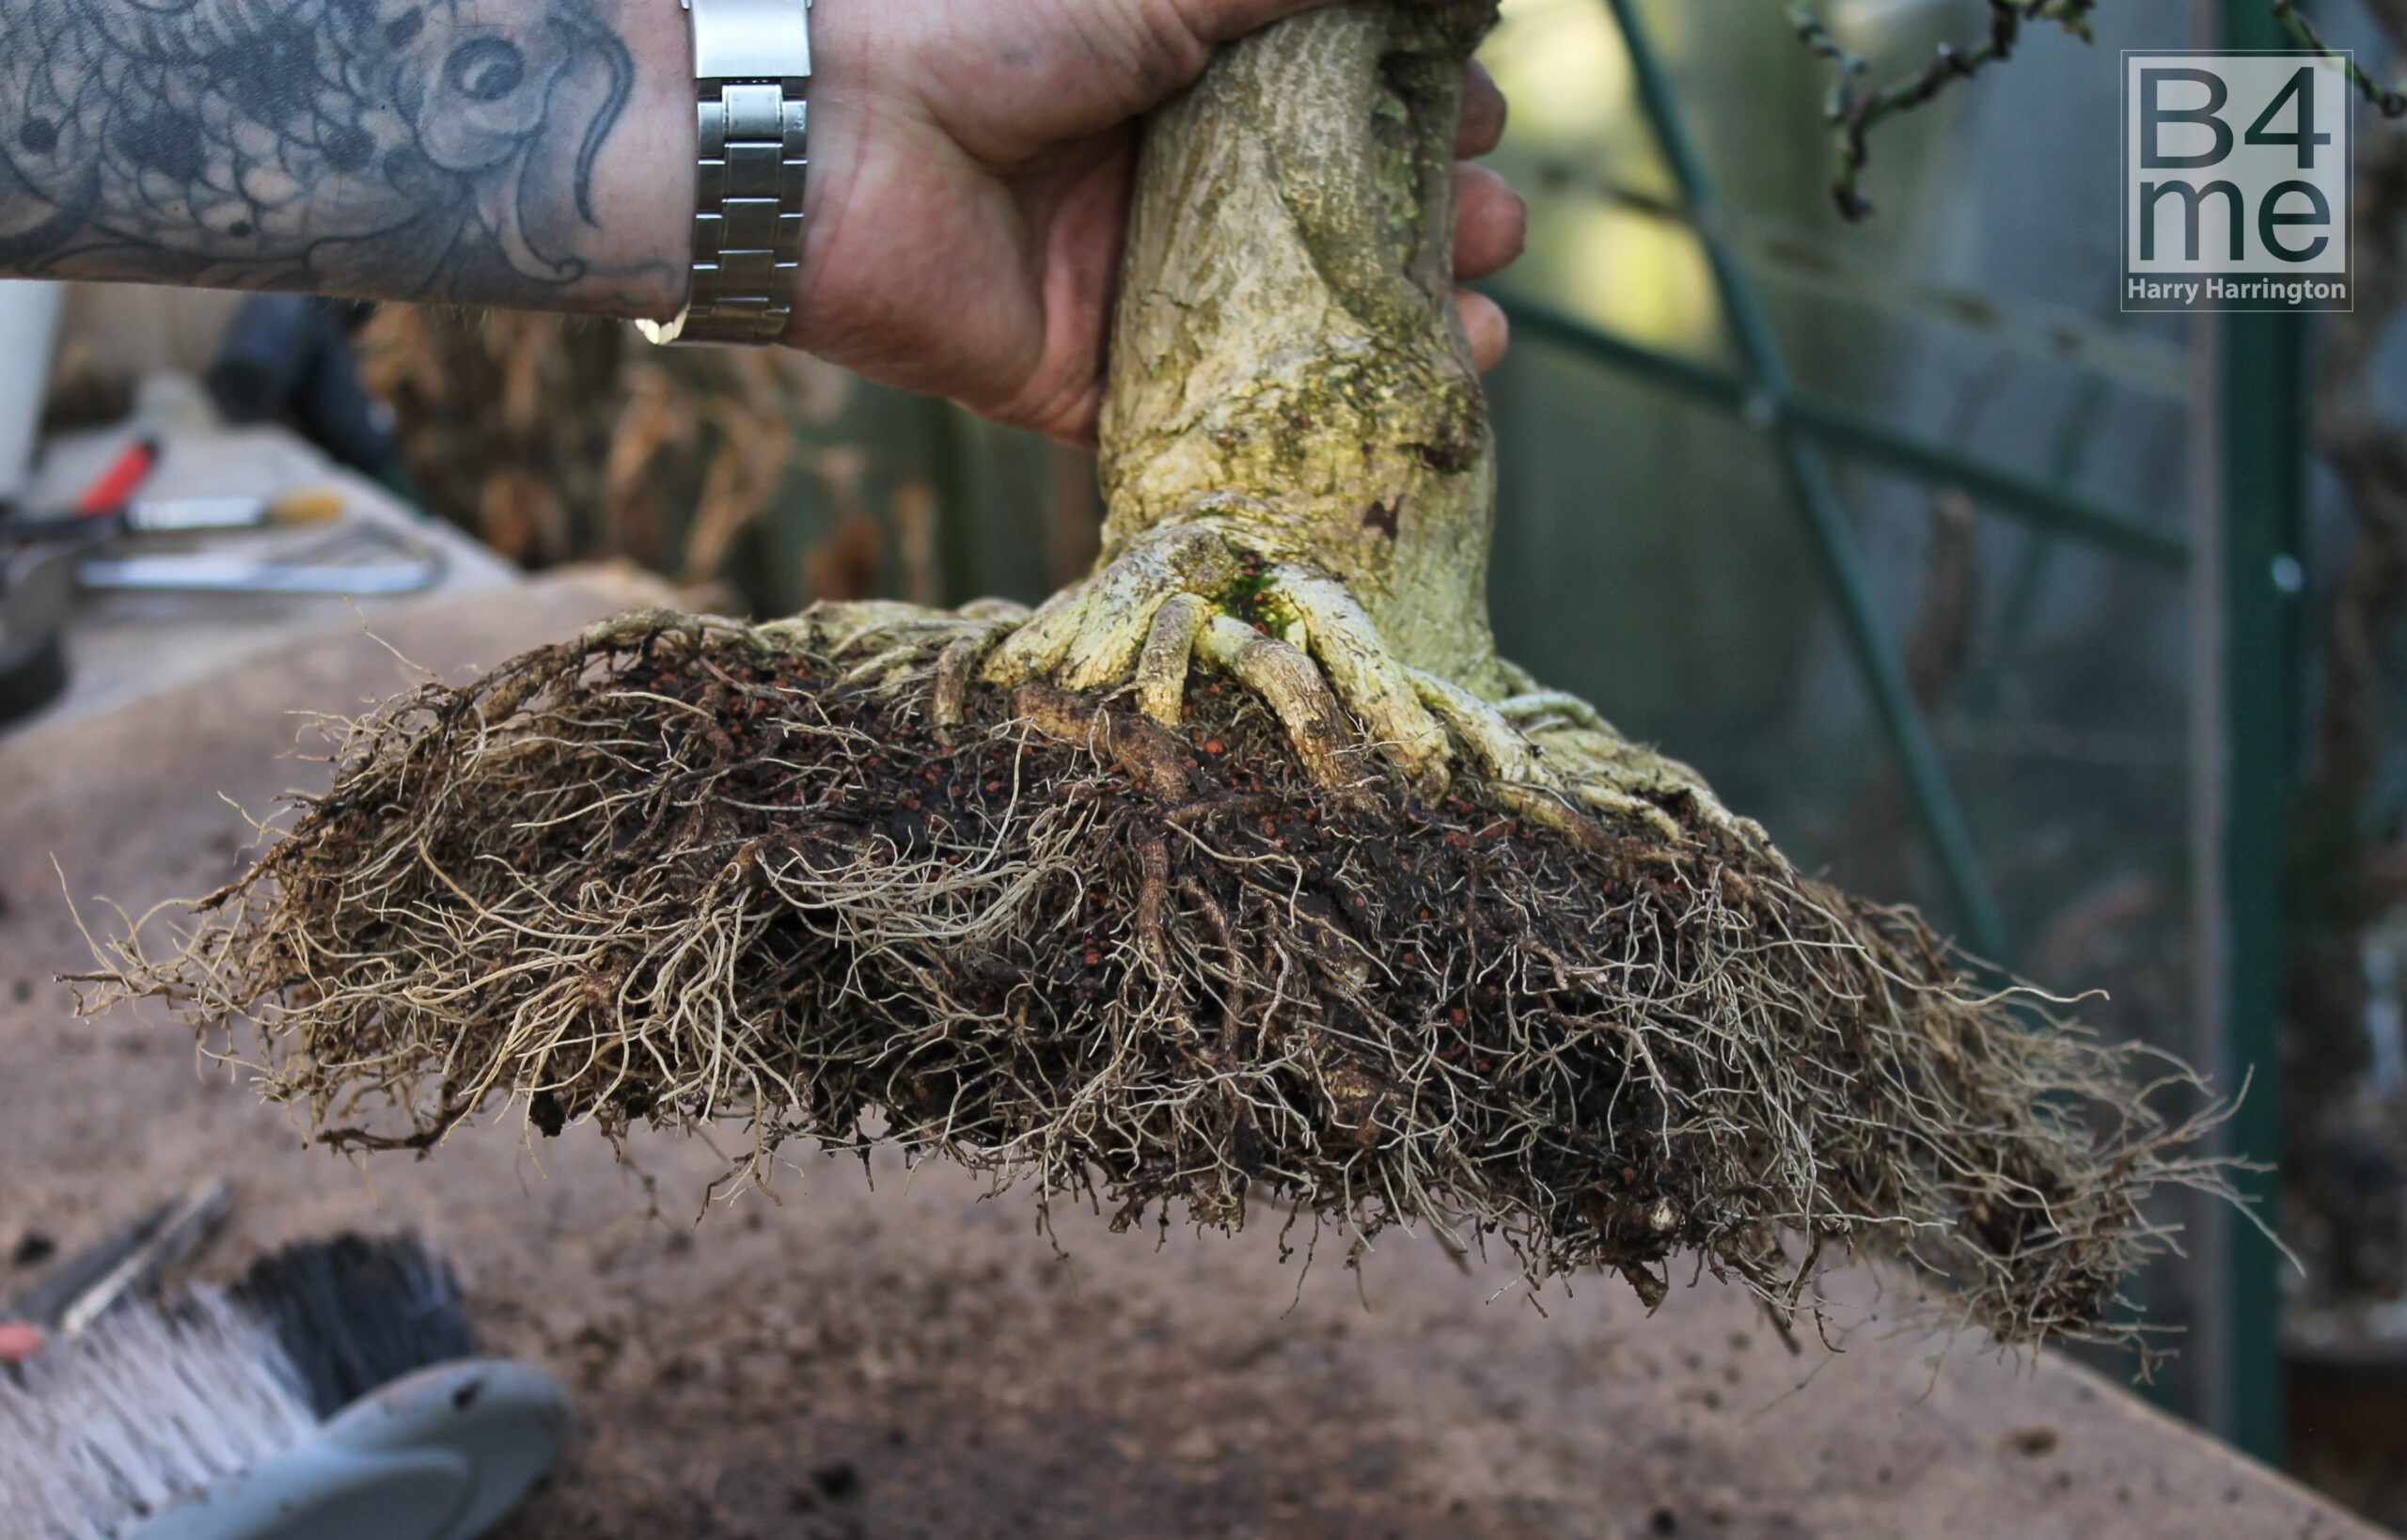
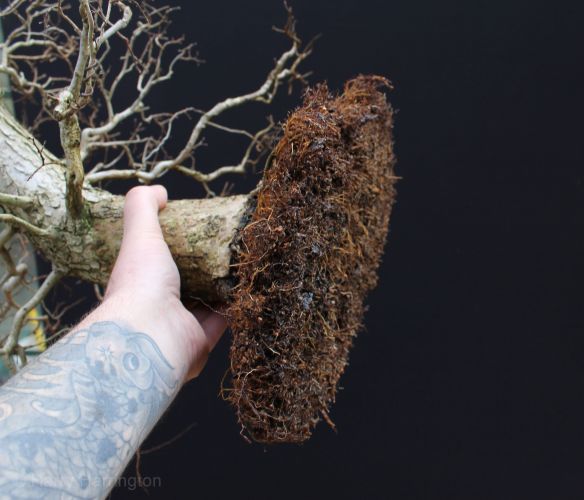
The Elm bonsai released from its pot. The roots have fully colonized all of the available space in the soil and have begun to circle around the edges of the pot. This is known as being “pot-bound” or “root-bound”.
Removing the Old Soil and Combing Out
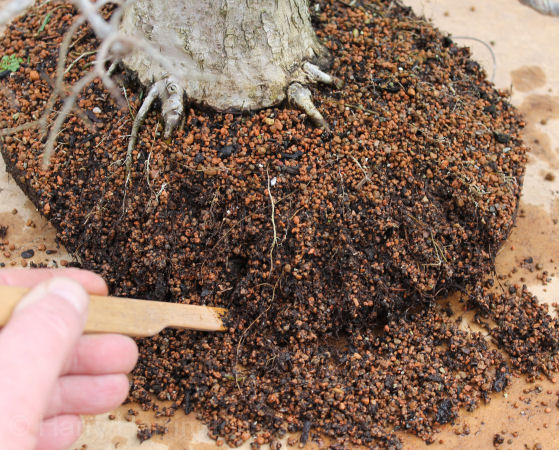
After the removal of the rootball from the pot, it is now necessary to comb it out. This not only removes much of the old compost but also disentangles the more vigorous, longer roots that can then be trimmed back.
Remove as much old soil from around the edges of the rootball as possible, using either a wooden stick or by hand, chopsticks are useful for this job. Metal root hooks are still used by some enthusiasts, but in my opinion it is too easy to damage roots this way; roots end up being torn rather than cleanly cut, as they should be.
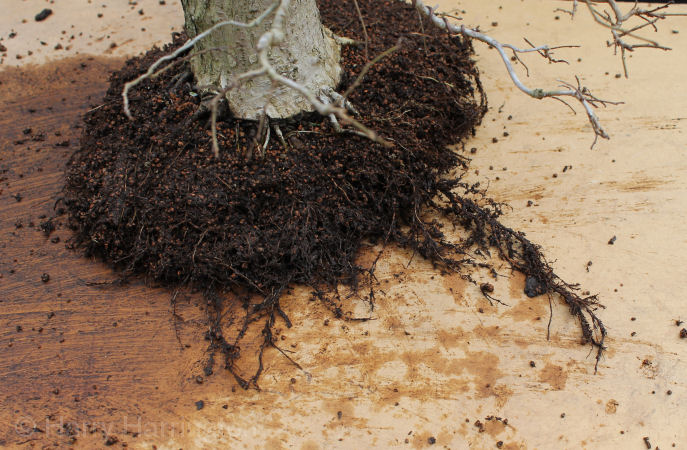
Attention can then be paid to the base of the rootball, disentangling and combing out the roots growing downwards. The roots of a bonsai are often described as being a mirror-image of the bonsai itself and in the same way that the upper branches of the tree require heavier pruning, the roots growing from the base of the rootball require heavier pruning.
After the old soil mass has been removed and the new root growth has been disentangled, excess roots can be trimmed back with a sharp pair of scissors or shears. The amount of roots that should be removed depends on a number of variables including the vigour of the tree, the density of the rootball and according to individual tree species. However, as a general guideline, aim to remove around 1/3 of the overall rootmass.
The remaining root system should be carefully examined for any root problems that may exist. Remove any dead, decayed or injured roots. Any dead or rotted roots will be black, slimy and their outer bark will slip easily from the root itself; severely rotted roots will be entirely hollow and crumble away.
Try to encourage the development of the rootball each time the tree is repotted. The trunk should have roots spreading radially from around its base; roots that grow upwards or recurve from the base (nebari) are considered ugly. Strong, thick, downward growing roots should be removed so that the rootball is flat and fit into the pot. Downward growing roots left unpruned can start to lift the tree out of the pot and will encourage strong apical growth in the crown (apex) of the bonsai.
Any other thick or straight roots should also be pruned back to a point where there are fine roots branching out. Thick or straight roots tend to rob the vigour of smaller finer growth. At all times when pruning back such roots, it is important that they are inspected carefully to ensure that their removal will not reduce the root-mass to a level where it cannot support the tree.

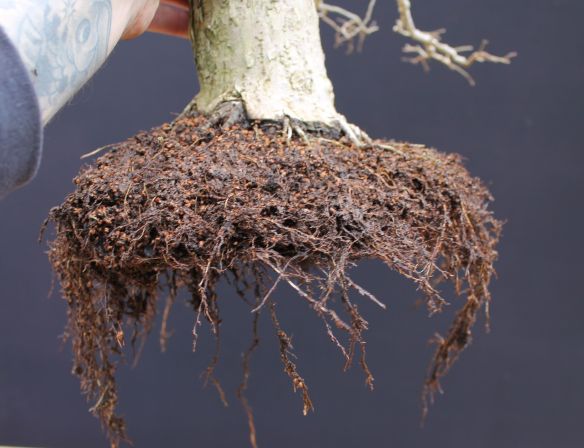
Note that the roots of this tree are already very dense and compact, and this allows them to be cut back hard, as shown in these images. It is safe to remove around 1/3 of the rootmass of all broadleaf and deciduous tree species. The base of the rootball is pruned back harder than the edges. This ensures that the bonsai sits low enough in its pot and also balances the vigour of the top branches of the tree.
Repotting
After the tree has been root pruned, it is then possible to place the tree back into a bonsai pot. If the pot has not already been prepared, it should be done now.
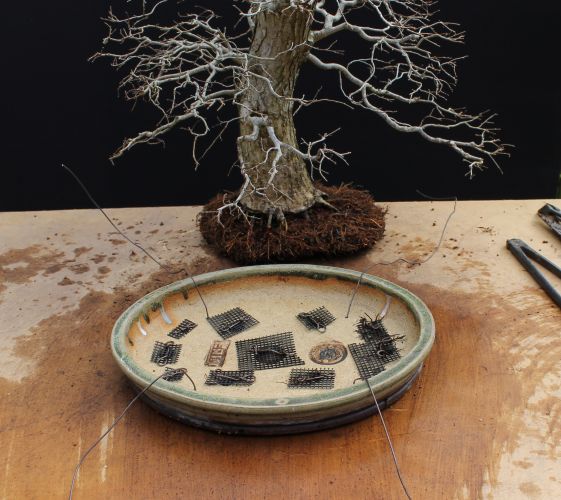
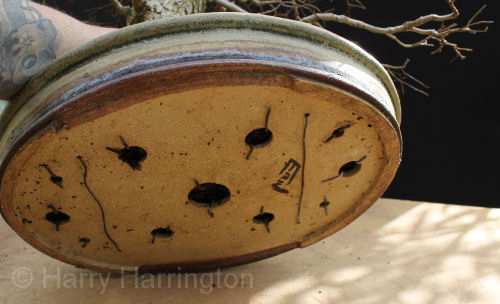
The root-pruned Elm and the fully-prepared bonsai pot.

Cover the base of the pot with a layer of soil creating a small mound where the tree is to be positioned, so that when finally planted, the outer edge of the nebari (surface roots), if there is one, sits just above the height of the rim of the pot. Offer the tree upto the pot; if it will not sit high enough, take it out again and add more soil. If the tree sits too high in the pot, remove some of the soil layer, if it still stands proud of the rim it may be necessary to remove some of the roots from the bottom of the rootball.
Place the tree into the pot and ensure that the exact front of the tree is facing forward. Tie it in firmly with the anchorage wires so that the tree is unable to be rocked about by the wind in the coming weeks whilst new roots are growing.
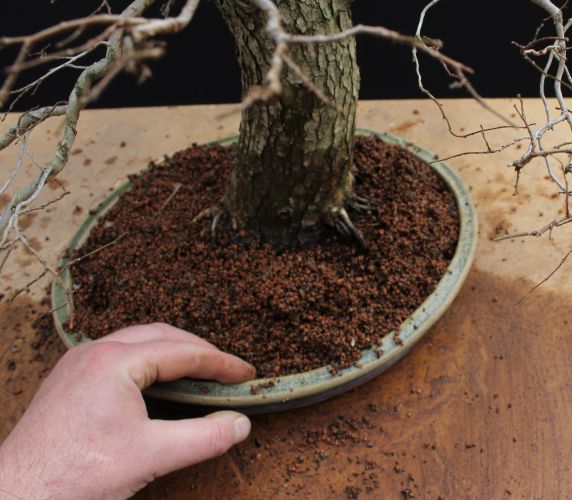
Start feeding in new soil around the edge of the rootball. Add fresh soil around the rootball and work it in with a bamboo tool.
Use your fingertips to gently firm in the new soil; it is much easier to feel where the empty cavities and voids are within the rootball this way.
When the soil is fully worked in, water the tree very thoroughly to ensure that the soil is fully wetted and any remaining air pockets are removed. Watering will settle the soil and it may be necessary to apply more soil to the surface. Re-water until it is certain that the soil has fully settled throughout the pot and all air pockets in the soil have been removed. It should be emphasised, the tree should be held in position by the anchor wires, not by the soil.
Watering-in the Elm bonsai. The soil is given a heavy soaking of water to remove air pockets in the soil.
Aftercare
Most trees will show no reaction to repotting and continue on throughout spring without any problems. Some extra care should be taken however in the six weeks after repotting to ensure the health of the tree. Avoid exposure to severe frosts, the tree should be regarded as less hardy than normal for six weeks after repotting. Do not place the tree where it is exposed to strong winds or intense sun. This is particularly necessary with evergreens as the increase in loss of moisture through the leaves as a result of the wind and sun will increase the stress on the newly pruned roots. It is likely that under windy or hot conditions, coniferous species will lose foliage if the reduced rootball is not able to replace evaporated moisture. If foliage does start to dry out on evergreens, provide a shady position out of the wind and mist the foliage regularly.
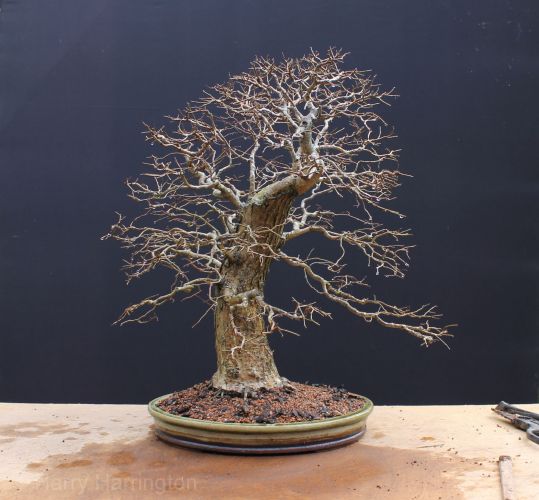
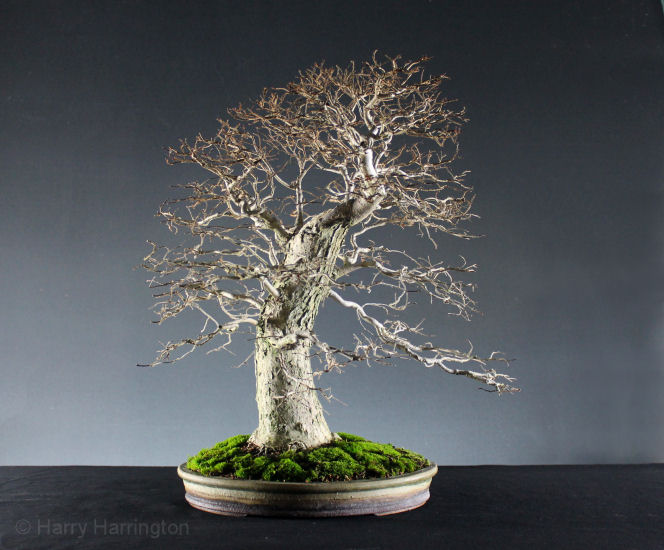
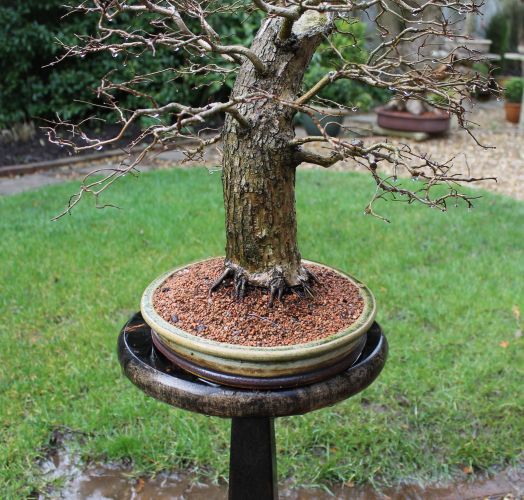
The repotted English or Field Elm bonsai/Ulmus minor. Height 17”/42cm. Pot by Victor Harris of Erin Pottery.