Discovering the reason why a bonsai is dying can often be difficult to establish. Very often the cause with beginners’ trees will be underwatering (the soil being allowed to dry out) or a tree that has been purchased growing in poor, congealed soil.
However, bonsai can occasionally show poor health, even in the hands of more experienced bonsai enthusiasts. Establishing the cause in these circumstances is just as important in order to avoid the same problem re-occurring.
.jpg)
The Juniper bonsai featured in this article was owned by an experienced enthusiast and its foliage had suddenly started to brown and die. By the time the bonsai was passed to me to try and save, half of the foliage mass had browned-off and died.
The pedigree of this tree, a Juniper chinensis “Itoigawa”, is that it once grew in a garden in Japan, had been imported into the UK in early 2000’s and ended up in the hands of the current owner for a considerable amount of money.
Strangely, although over half of the foliage mass had died, there was still a sizeable amount of healthy foliage left. This immediately suggested that for some reason, a portion of the rootball/rootmass had died, causing the top-growth it supported to die off as well…….however, the remainder of the rootmass was probably healthy and as consequentially its connected foliage remained healthy.
There was some evidence on the dead and live branches of spider mites, however, insect attack is often a result of poor health in a tree, rather than the cause.
.jpg)
Prior to work, the appearance of the Juniper bonsai from the front. (In many of these images, the tree and the Brian Albright pot it is planted in, are placed inside a possible alternative pot, ultimately I decided to keep the bonsai in its original bonsai pot).
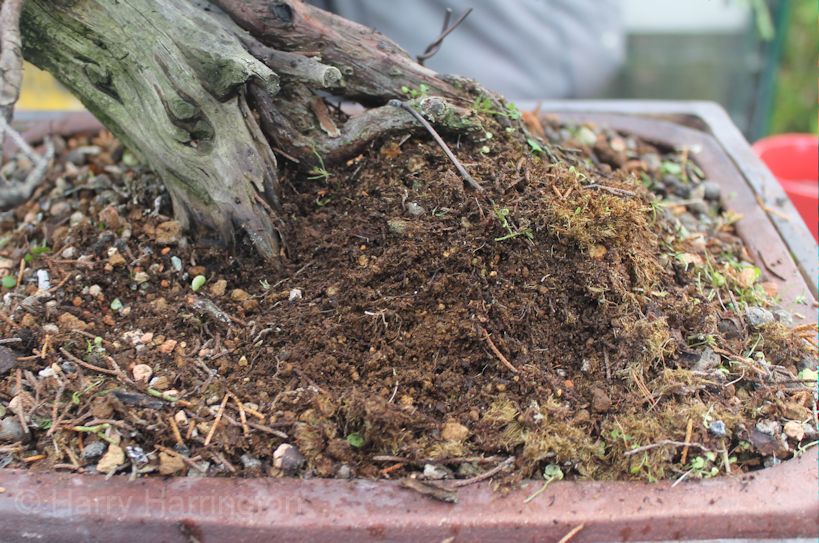
While my apprentice removed dead foliage with scissors, I wanted to be able to inspect the soil surface and began to pull away the various weeds that had sown themselves there. With the weeds removed, it became obvious that the tree had a nucleus of broken down Akadama (low-fired bonsai soil that quickly turns to a sticky clay) around its roots and this had been placed into a good quality soil, consisting of fast draining high-fired clay granules. As Junipers cannot be bare-rooted and all of the Akadama removed all at once, planting a tree in this way is quite common and allows the tree to root itself into the new soil while the Akadama is removed over a number of years.
As can be seen in the image above, the Akadama was very dry despite the surrounding soil still being moist. This can happen when Akadama becomes compacted and no longer accepts water (instead of being absorbed, water runs off its surface). My initial suspicion was that the parts of the root system still growing in Akadama had therefore dried-out and died, with the resulting loss of foliage. This would then explain why the rest of the tree was alive and healthy, those roots not growing in Akadama were also healthy.
This is a fairly common problem with coniferous species such as Pines and Junipers, planted in Akadama and to rectify this, I tend to remove all the Akadama that I can using a chopstick, without disturbing any live roots. The Akadama is then replaced with a high-fired inorganic soil and this is normally sufficient for the tree to recover slowly over the following growing seasons.
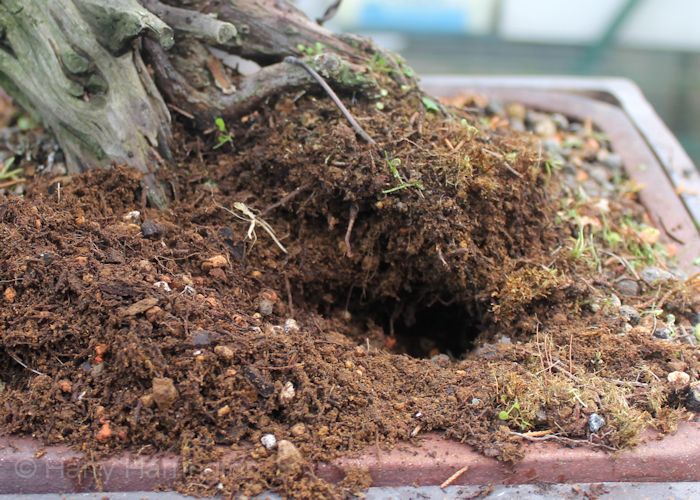
As I gently pulled away the Akadama, leaving a large number of dead fine-feeder roots that had obviously died recently (as they had not had long enough to rot and crumble away completely), I was surprised to find a large void underneath the section of the rootball and the real reason for the death of one half of the tree became immediately obvious………
.jpg)
…….Seen from the right hand side of the bonsai, I had noticed that the planting angle of the Juniper had been changed in the recent past and the tree had only been secured with one (fairly ugly) tying-in wire. The owner of the garden in which the tree had been living for the past couple of years suffers very high winds and I realised that the tree had been turned slightly in its pot during a high wind, leaving the roots on one side of the tree in a void with no soil, quickly leading them to dry out and die.
A good reminder to always tie-in a bonsai very firmly into its bonsai pot, if ever I saw one!
With the reason for the dieback of the tree established, I finished removing as much old Akadama as I dared, repositioned the planting angle of the bonsai and infilled around the rootball with high-fired inorganic soil.
.jpg)
By this point, my apprentice Sean had finished removing the dead foliage and we were able to consider the future of the bonsai.
.jpg)
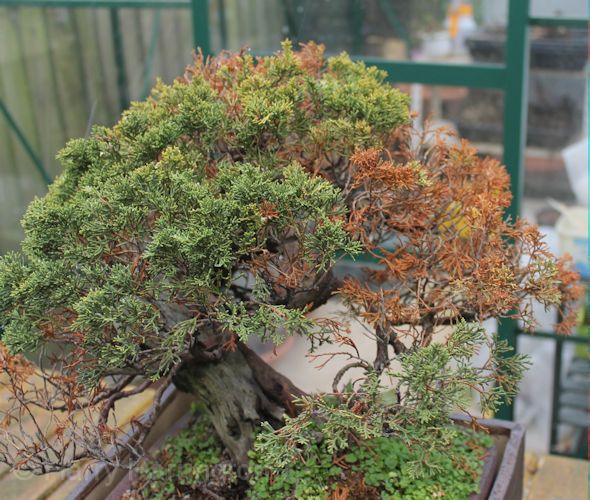
The “healthy side” of the Chinese Juniper foliage mass. There is more than enough healthy, live foliage to restyle the Juniper when the next growing season begins, however, the tree will be allowed to extend new shoots first, to confirm that the tree, and the foliage, is strong enough to be worked.
.jpg)
The Juniper bonsai seen from the “unhealthy side” of the foliage mass and the front. Although now bare, during styling, healthy green foliage from the back of the tree will be brought forward to rebuild a new crown and branch structure. Rather than remove all of the dead branches, a number will be retained as jin (deadwood branches) and used as part of the new design.
The Re-Styling
.jpg)
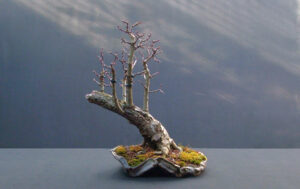
The Chinese Juniper bonsai in early 2015, suffering from severe dieback.
The Chinese Juniper in early February 2015, as seen from the front. The previously healthy tree had suffered severe dieback of the foliage, losing over 70% of its live growth. As previously described in Part One of this article, I discovered that the tree had come loose in its pot and as a result, much of its rootball had been left exposed causing the dieback.
The Juniper bonsai was righted in its pot and the dead foliage removed. All that could then be done was to wait for the tree to react, hopefully, with new green growth.
.JPG)
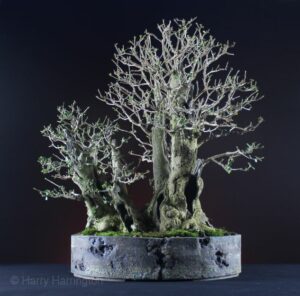
By June the bonsai was looking much healthier and had burst into life. Here the bonsai is seen from the back where there had been less foliage loss.
With the real reason for its ill-health identified and corrected, as expected, within a few months it began to react positively and by midsummer had pushed out a huge flush of green growth.
And so in late June, knowing that the tree would survive and continue to prosper, I began to refine the old deadwood and create deadwood effects from areas that had recently died.
..JPG)
The deadwood completed.
My intention when carving the deadwood was to adhere to the (excellent) existing design but to embellish and exaggerate the manmade and natural carving lines the tree presented me with.
With the deadwood worked, new jins and shari created, and whitened with lime-sulphur, the tree was allowed to rest. While a further flush of green foliage would appear through July and August, I would have time to be able to consider how best to re-design the foliage mass of the tree, all of which emerged from a small number of back branches.
.jpg)
Detail of the deadwood.
.jpg)
Detail of the deadwood.
This image of the centre of the bonsai, as seen from above, shows how it was reduced from a much larger tree. A low branch had been split away from the trunk and coiled around itself, leaving the secondary branches available with which to spread out into a 360º branch structure.
.jpg)
After laying-out the foliage in August.
In mid-August I fully wired the remaining live branches on the bonsai and began to lay them out (See Laying Out Juniper Branches ). With a considerable reduction in foliage after the dieback of the previous Winter, it was not going to be possible to build a large foliage mass for the bonsai. Indeed, I felt that a compacted crown that allowed the new jin to be seen to grow through it would compliment the deadwood.
I prefer to wire Juniper during the end of their second flush of growth in August. August in the UK is still warm but the heat of the Summer has largely passed and the air is humid. The tree is also able to react immediately to repair any damage caused by the wiring and styling of branches.
.jpg)
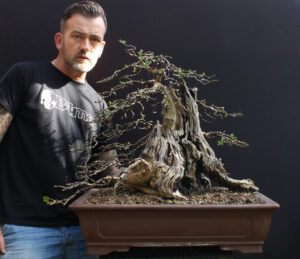
Final image of the front of the Juniper bonsai in September. Height 10.5″/26cm. Pot by Bryan Albright.
A month later in September 2015, 8 months after first receiving the tree, and the ‘final’ images of the completed styling. As expected, a small number of tertiary branches died-back as a result of the twists and bends I put into them while laying out the branches, but otherwise, the tree is vibrant and healthy.
.jpg)
An alternate front view of the Itoigawa Juniper.
.jpg)
From the right hand side.
.jpg)
The tree as seen from the right/back. Here it is just possible to see some of the twists and turns I needed to put into the branches to place them for the new design.
.jpg)
The Juniper as seen from the front-left.