This huge Privet (Ligustrum ovalifolium) was dug up in 2009 from a hedge in West London by its owner. Its a tree that I have worked on, on and off, over the past 6 years during visits to the owners’ garden. Having seen the tree develop slowly over the years I was very happy to then be commissioned to give the tree its final styling.
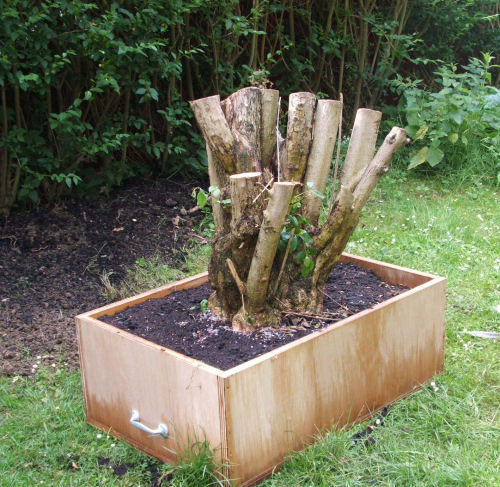
Back in 2009, after collection, such was the size of the stump, it was simply boxed up where it stood after collection.
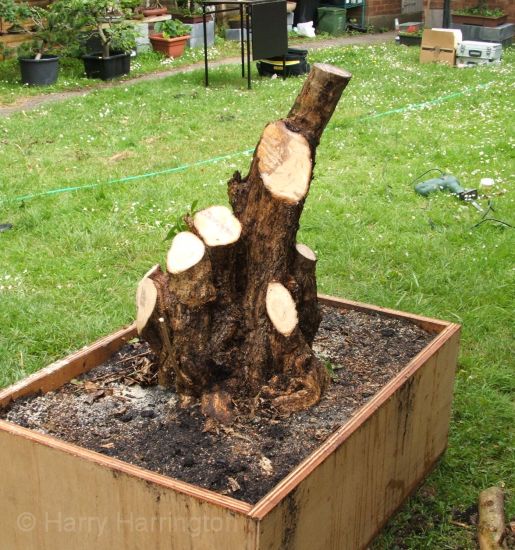
August 2009: Not long after collection, I removed the many straight-sections of trunk using a reciprocating saw, leaving a tapered stump.
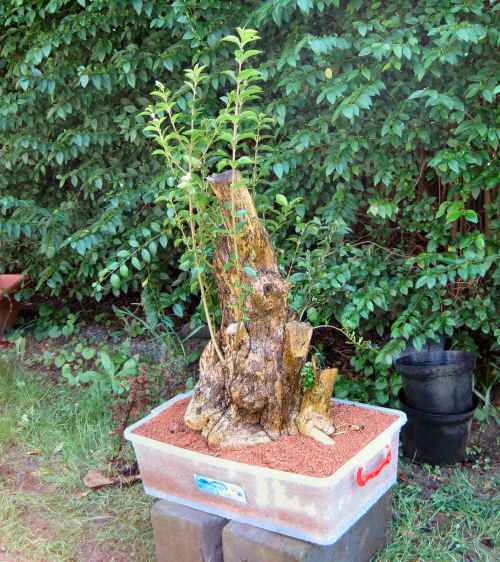
The Privet was then bare-rooted and replanted into a much smaller container. Long-time readers of Bonsai4me.com may remember the article “Bare-rooting a Collected Privet” that detailed the repotting.
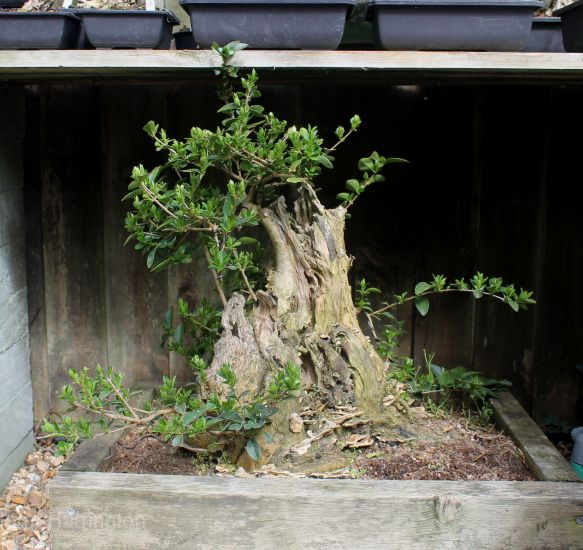
April 2015: 6 years passed and the tree arrived with me in my garden. It had already gone through a huge transformation, having been carved by another bonsai artist before being left to one side waiting for its final styling.
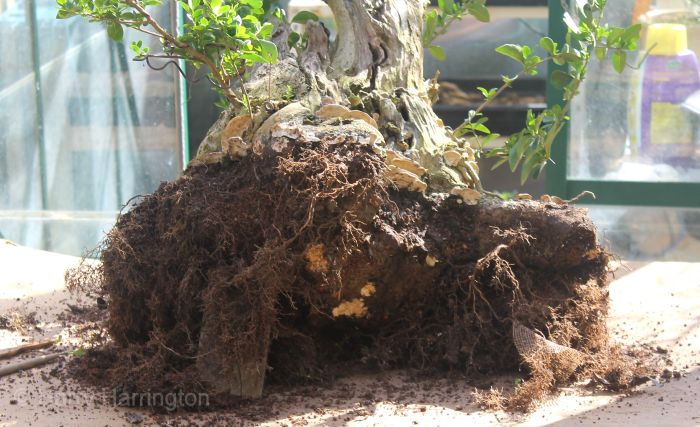
There were a few problems with the tree however; principally the deadwood was still unprotected and had started to rot badly (hence the bracket fungus seen in the image above). The Privet was also planted in an over-sized box made from very heavy scaffolding boards………the sheer weight of the tree and the box made it incredibly heavy and difficult to move.
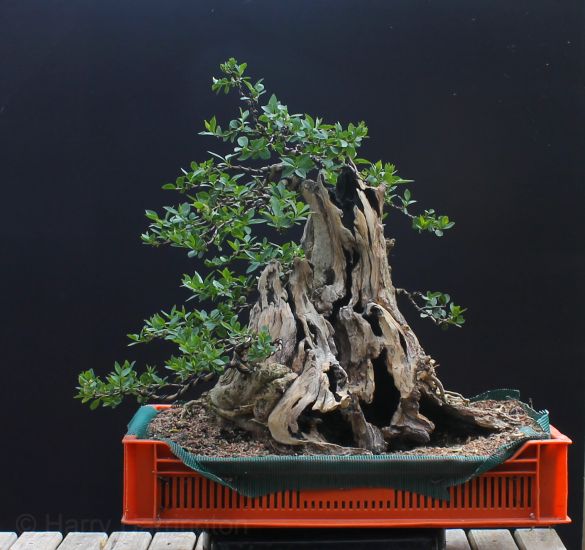
My first job was to remove the tree from the box, remove the heavy, gritty soil mix………….
………….and replant it into a more suitably-sized plastic crate. This made picking up the 45cm wide tree much easier!!!
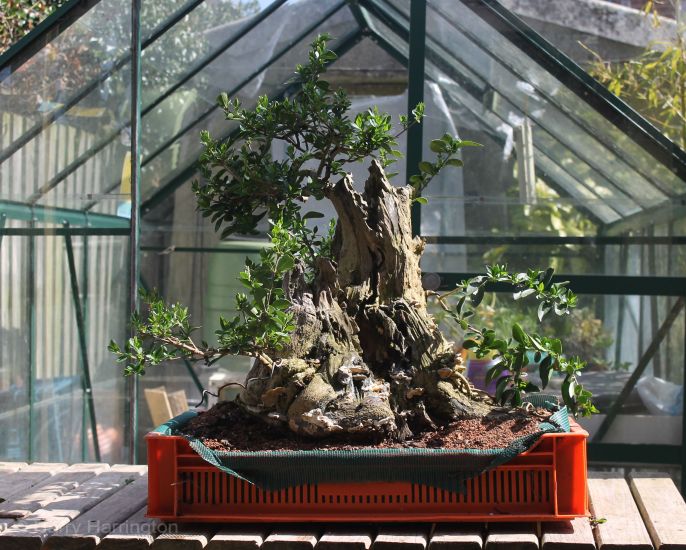
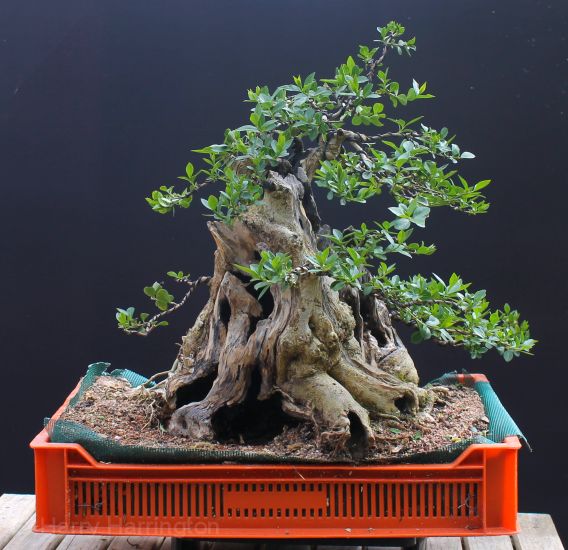
It was then possible to start re-styling the tree………
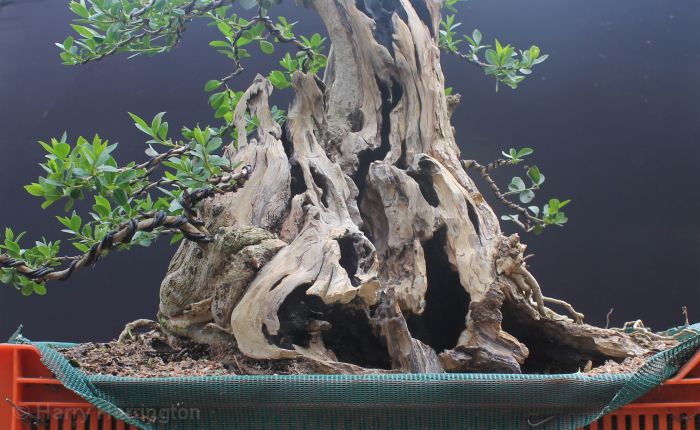
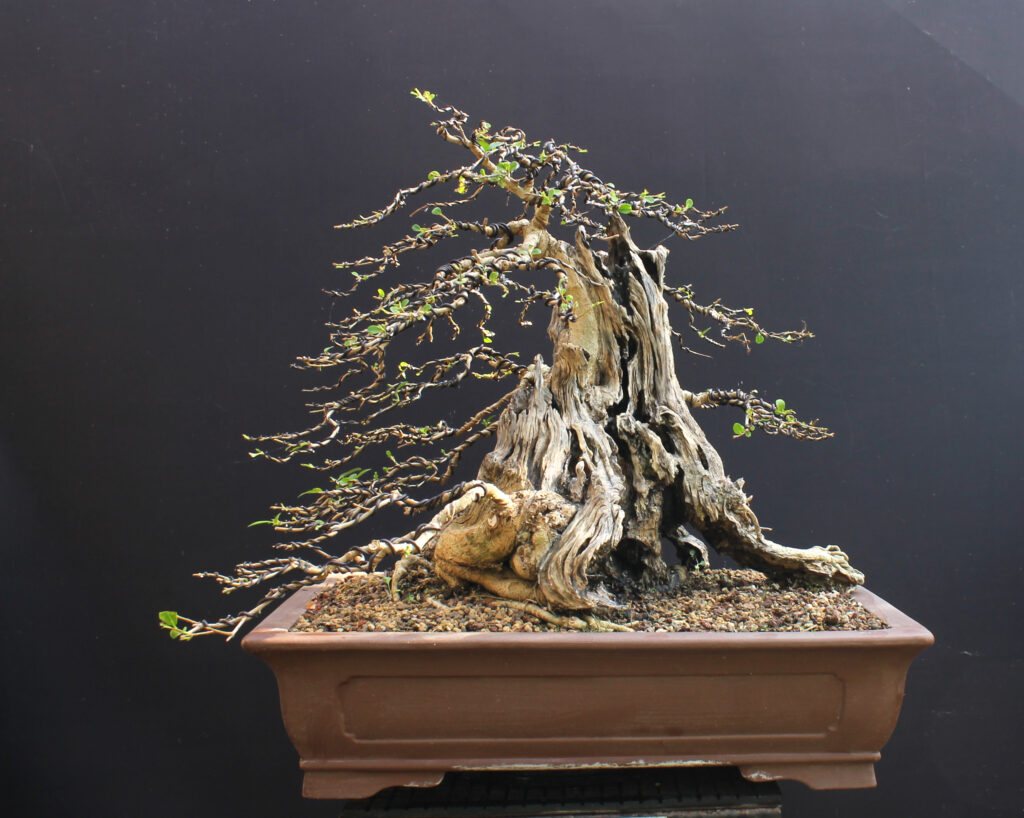
Over 2 weeks in April 2015 I carved and styled the Privet. I had to remove a lot of wood from the base of the tree where it had been in contact with the soil. Whilst it is possible to harden and save rotting Privet deadwood with wood-hardening products, if the wood is too soft and crumbling, it is too rotten to save and it is better removed back to more solid wood. Once the soft, pulpy wood had been removed, the remainder was shaped, embellished and smoothed out. The deep hollows were blackened using a black waterbased ink and the exterior surfaces, or ‘skin’ had a couple of coats of watered-down lime-sulphur applied. The purpose of the using the lime-sulphur was to kill any remaining fungi and to create a more uniform finish to the ‘skin’ of the deadwood (rather than turn it white).
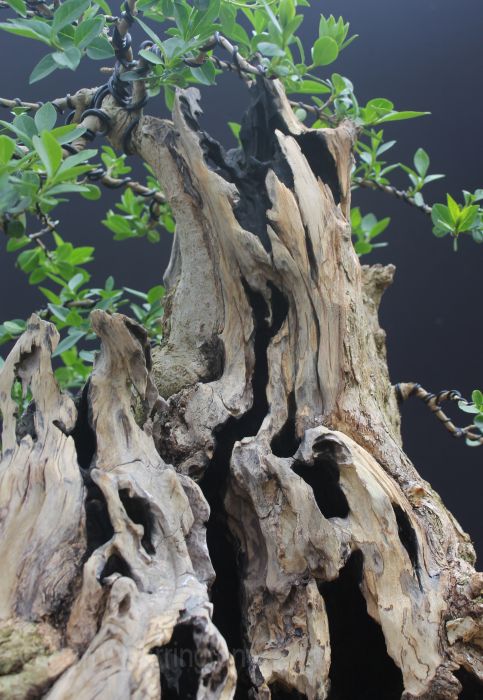
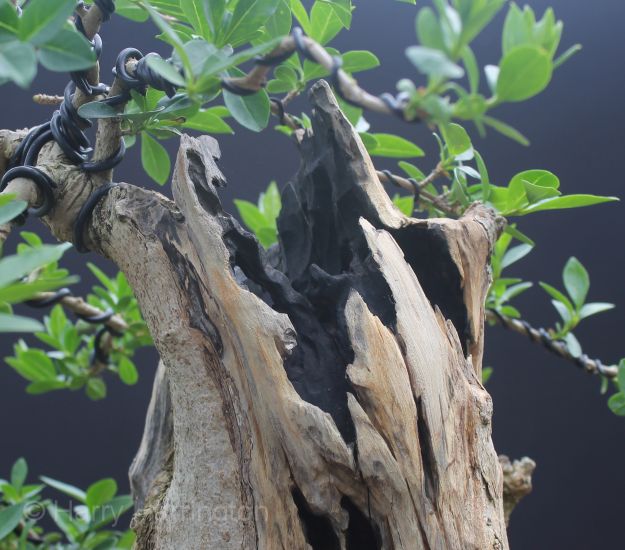
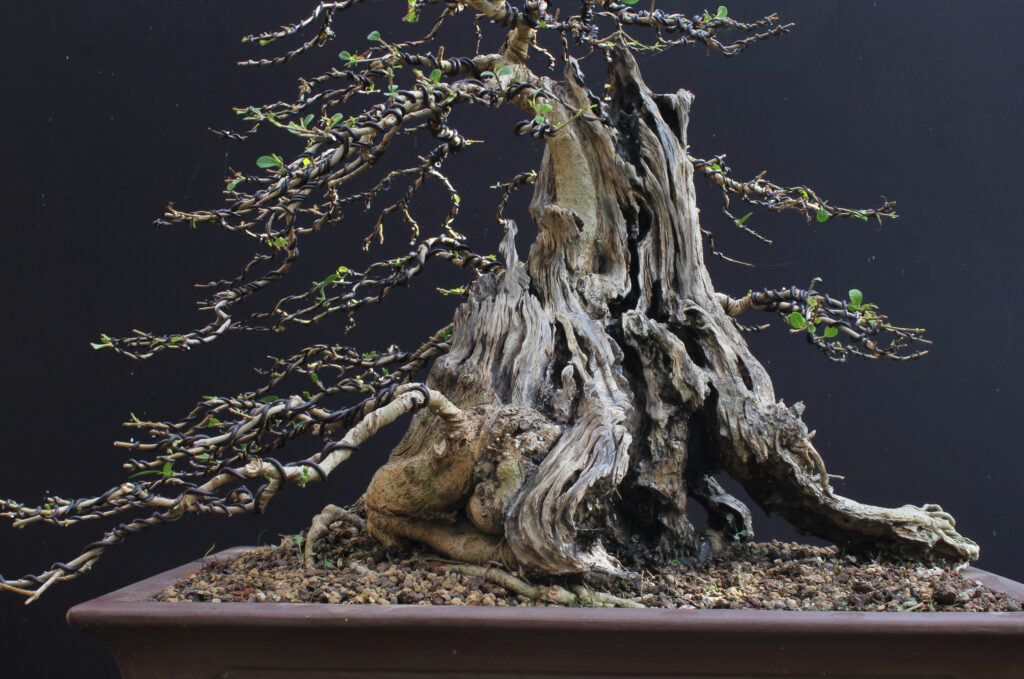
Detail of the top of the trunk
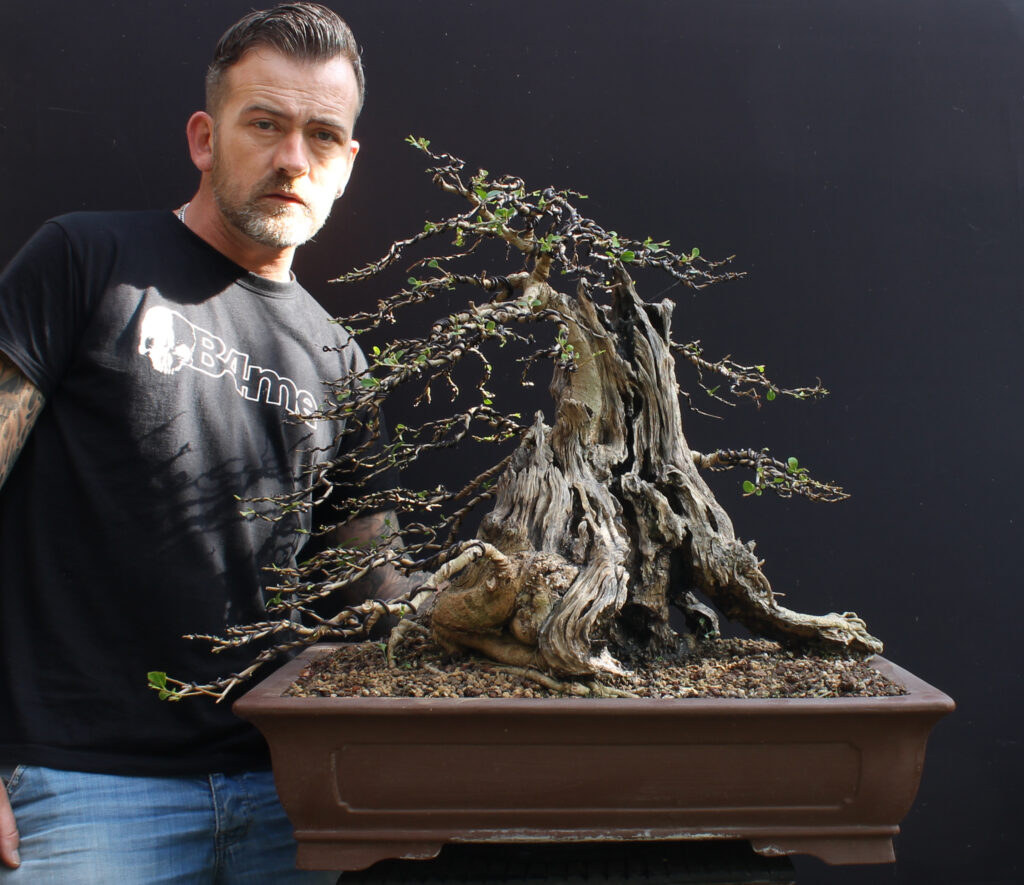
The fully styled Privet bonsai as seen from the front of the tree. Height 19″/46cm, width 17″/42cm
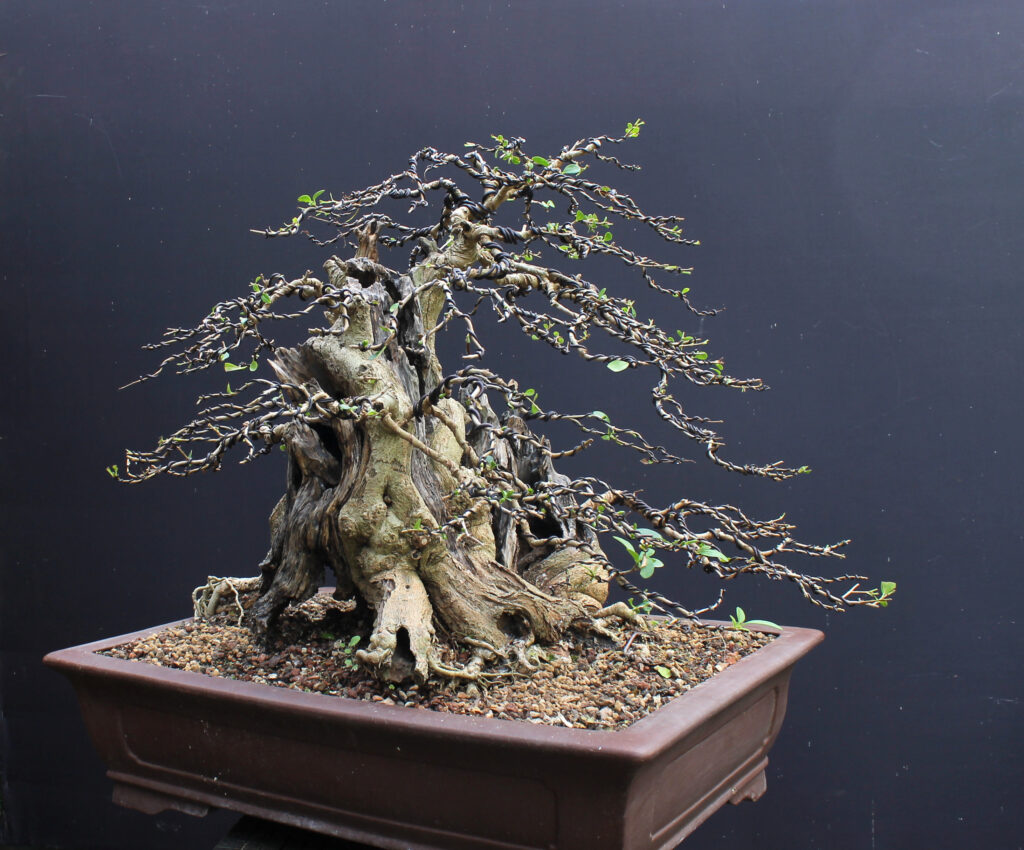
The Privet bonsai seen from behind……..
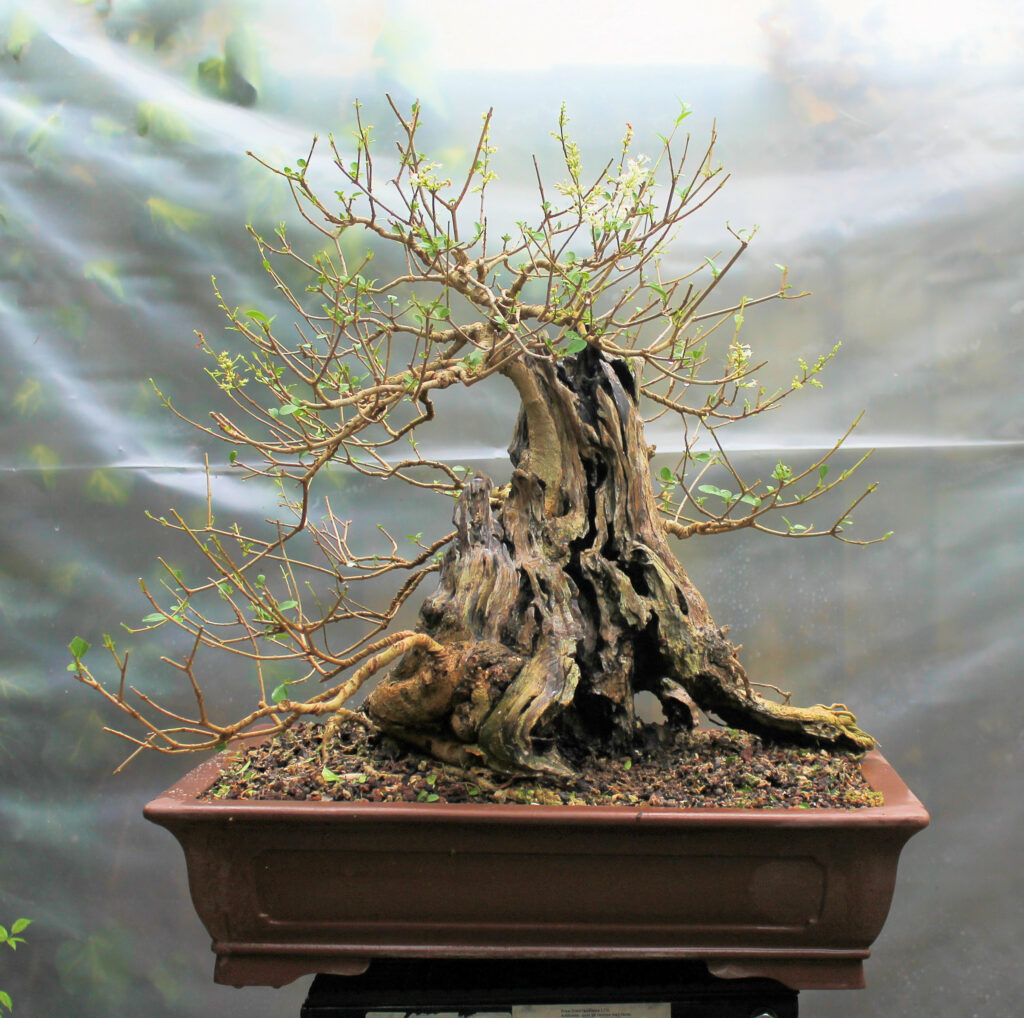
July 2017: Two years later and the Privet came back to me for further refinement work and to address some problems with rotting of the deadwood.
The tree is seen here after full defoliation so that I could fully wire the tree again.
While it had been back in the garden of the owner it had been allowed to grow to help thicken the primary branches and had been potted into a final (unknown) bonsai pot.
I used a large quantity of cyanocrylate (super or krazy glue) to protect and harden the deadwood; in total nearly 1/4 litre was applied and allowed to dry before and went over all areas of the deadwood, refining it further. There followed another 100% wiring job and laying-out of the branch structure.
July 2017: After my work on the deadwood and branches was completed.
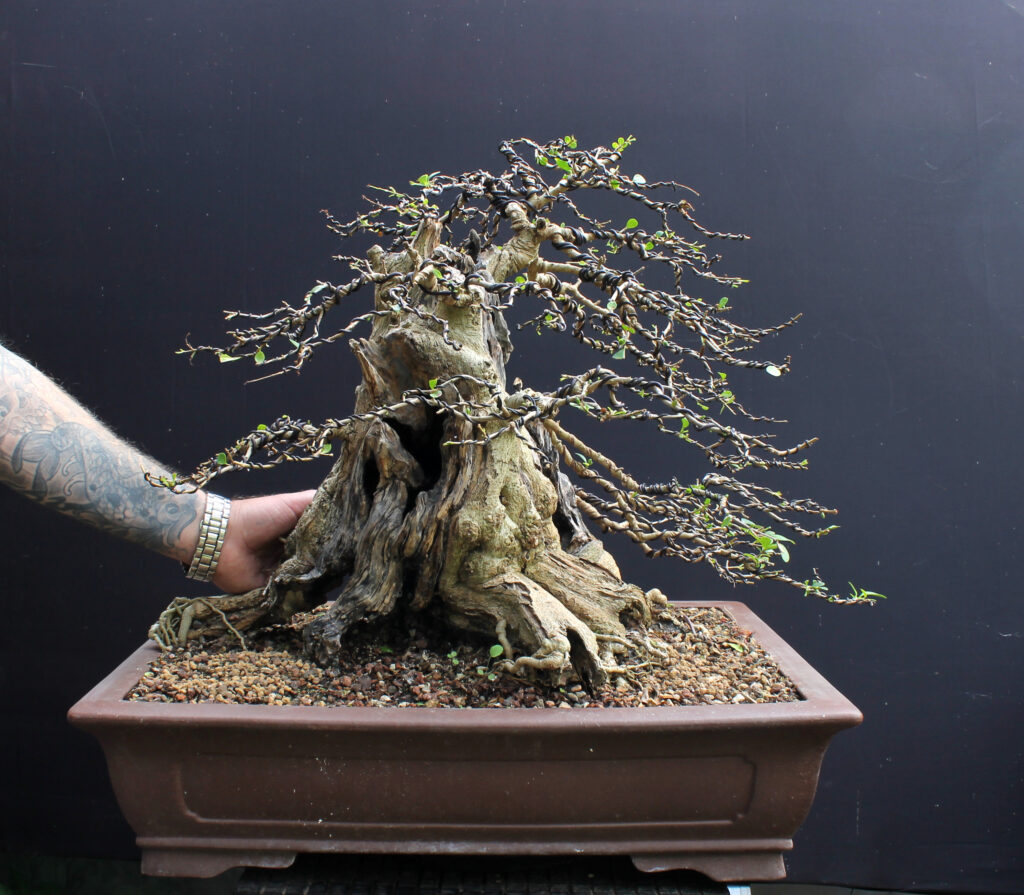
The Privet bonsai pictured with bonsai artist Harry Harrington.