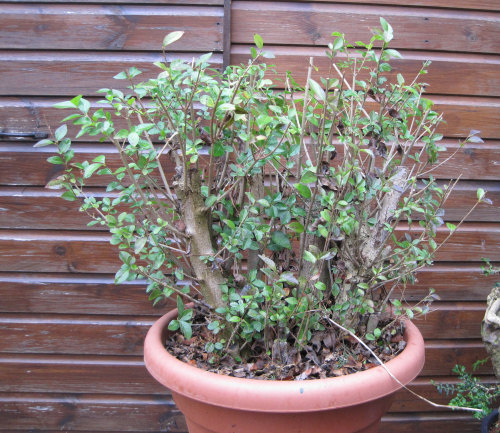
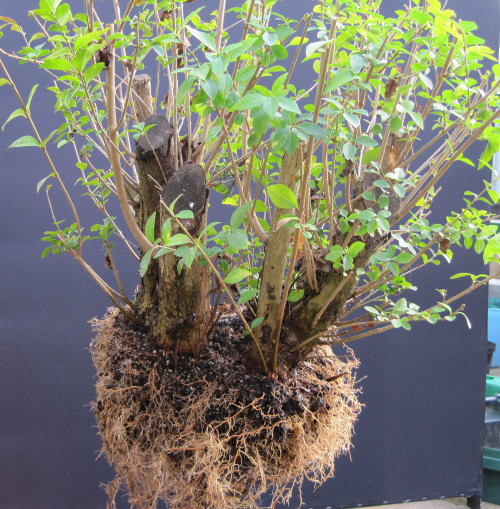
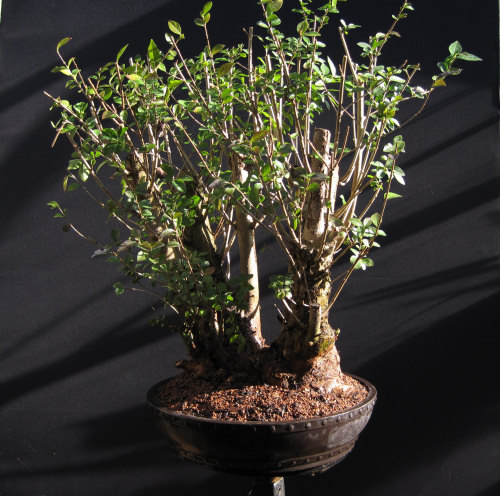
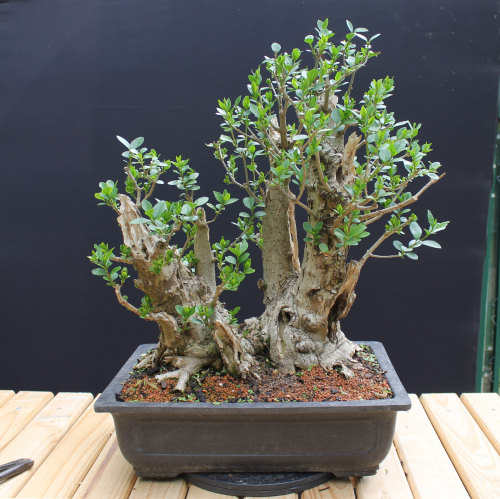
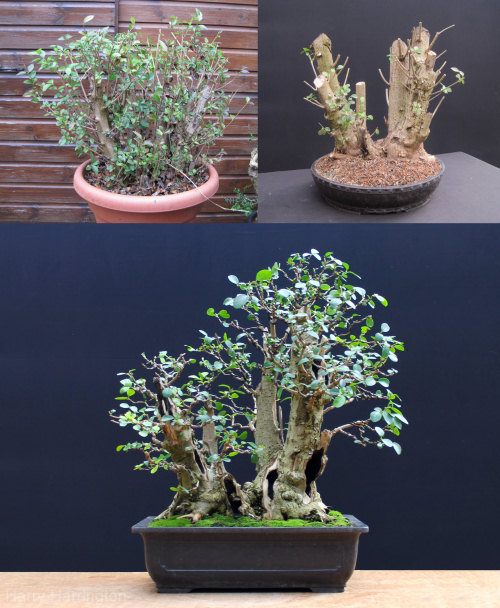
February 2012: This Privet (Ligustrum ovalifolium) was originally dug from a hedge in London, England during 2010, and had been planted into a large plant pot by the owner. One of around 30 trees collected from the same hedge, this particular privet was seen as the runt of the litter. As a result it had been left to grow unpruned in the corner of the owners garden for 18 months until it was foisted on me!
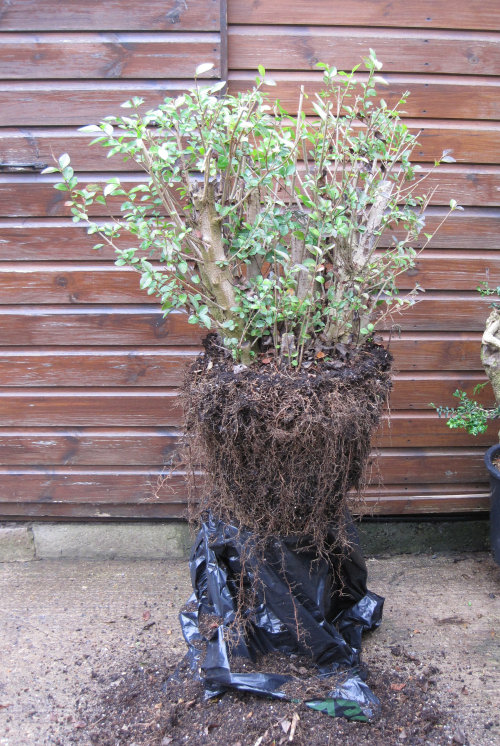
The Privet itself was in excellent health, and once I had removed it from its pot, it became apparent how well it had recovered from being dug up from the ground. The rootball was a mass of vigorous new roots.
The tree itself was fairly typical of hedging-privet; it consisted of 5-6 straight, taperless trunks that joined together at a common base. As I have illustrated before with a Privet collected from the same hedge, one approach with material such as this is to remove the relatively thin, straight trunks and develop a bonsai from the much larger base.
A second approach, as I will show in this article, is to retain the multiple-trunks and form a multi-trunk or clump-form bonsai.
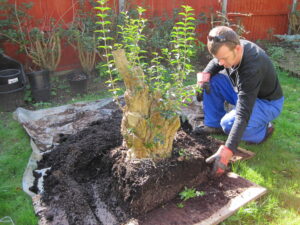
My next course of action, as is typical when working on Privet bonsai, was to reveal the base of the trunk. This would allow the entire tree to be studied, and the process of designing the bonsai within it, could begin. As I was also eager to replace the organic peat-based compost with good quality inorganic soil, I decided to bare-root the Privet.
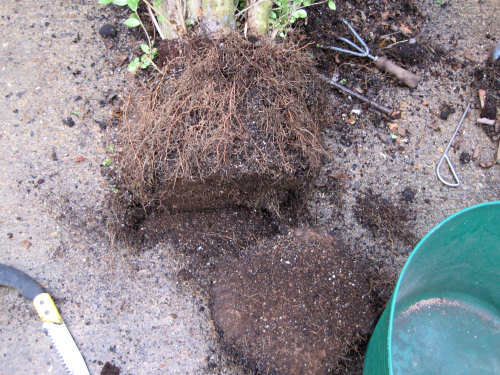
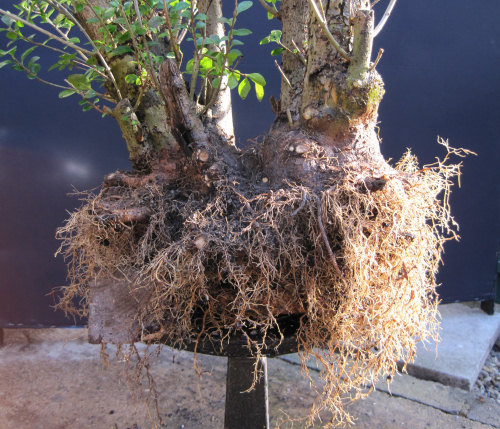
The soil was extremely densely-packed with fine roots. Knowing that there was more than enough volume of roots to support the tree, I simply sawed away the bottom 1/3 of the rootball rather than try to delicately remove the soil only to then prune away the bottom third of the roots.
The Privet trunkbase after bare-rooting (removal of the soil). As can be seen in the image above, the rootball was now largely free of soil and this allowed the roots to be studied more closely and worked on.
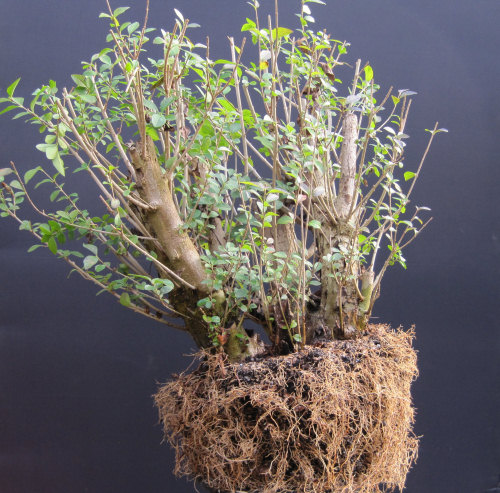
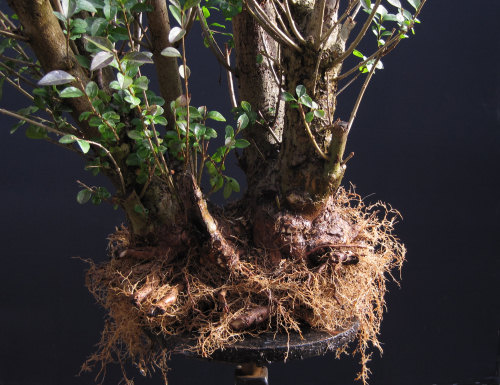
February 2012 continued: After cleaning the surface of the rootball, it was possible to see where the various trunks met at the trunkbase. However, to reveal the trunkbase fully would firstly require careful removal of all the fine roots that emerged from it.
After removal of some fine roots and cleaning away of more of the peat-based soil, as well as ground-soil from when the tree grew as a hedge, the powerful trunkbase was fully revealed.
With such a large volume of fine-roots still remaining after bare-rooting, I decided that the tree could be planted straight into a large bonsai training pot. To ensure that the Privet could fit into a shallow pot, I had to remove a number of thick (5-10cm) stumps from underneath the trunkbase.
The Privet with a nice, shallow rootball, ready for planting into its new home.
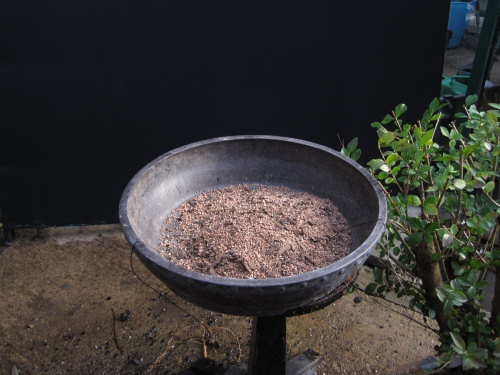
A 15″ diameter mica bonsai training pot prepared for the tree.
February 2012 continued: After several hours work over the course of a day, the Privet was successfully repotted.
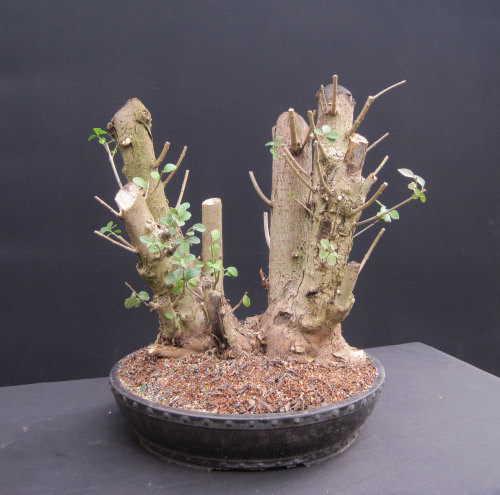
February 2012: What then remained to do was to chop the trunks to a height proportionate to their diameter (so that thickest trunks were also tallest). The branches were then pruned back hard to encourage strong budding during the coming Spring.
The Privet was then encouraged to grow as strongly as possible throughout the growing season of 2012. The tree was fed heavily with solid, slow-release fertilizers as well as liquid feeds, given plenty of light and water, and only new shoots in the apex were pruned (to stop them becoming too coarse and thick).
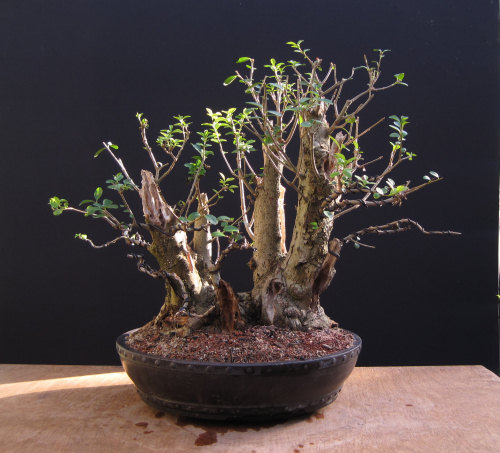
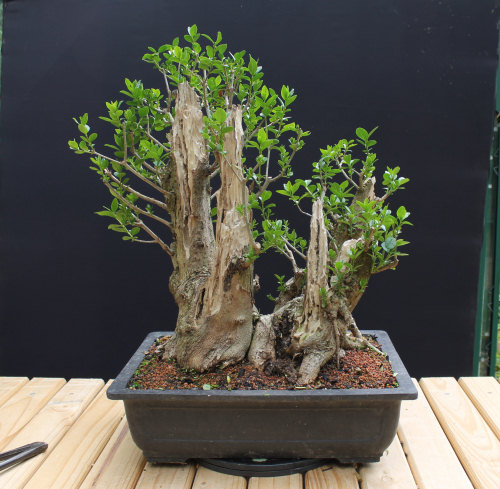
January 2013: After further styling, almost a year later. The bonsai had responded well to the work of early 2012 and a great number of new shoots appeared that were used to help develop the new branch structure of the tree.
My principal goal during this second styling was to address the trunk-chops of the previous February, and to introduce some ‘distance’ or gaps between some of the trunks as well as some taper.
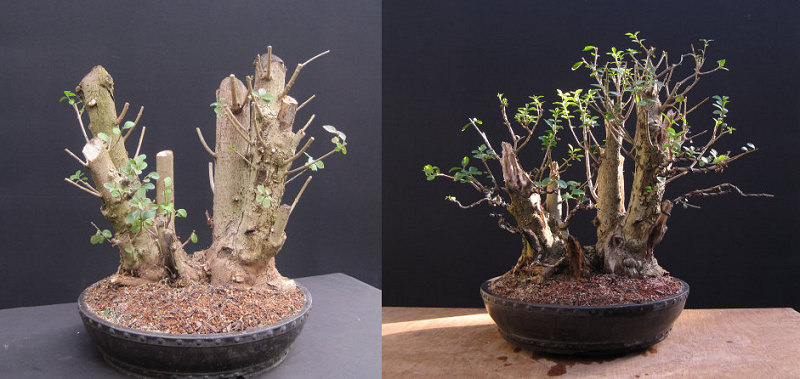
Comparing the two images (February 2012-January 2013), it is possible to see where I had removed a large trunk on the left hand side of the bonsai. The chops on all of the tunks were dressed to give a more natural appearance of old tapered trunk-tops.
Finally, I had ‘carved taper’ into a number of the trunks by creating shari (deadwood) at the back and/or sides of the trunks. This had allowed me to make the trunks taper slightly and create some distance between two biggest trunks, on the right hand side of the bonsai.
May 2013: Four months later and the Privet bonsai was planted into a slightly smaller and more appropriately-shaped training container, just as the new buds begin to extend in mid-spring.
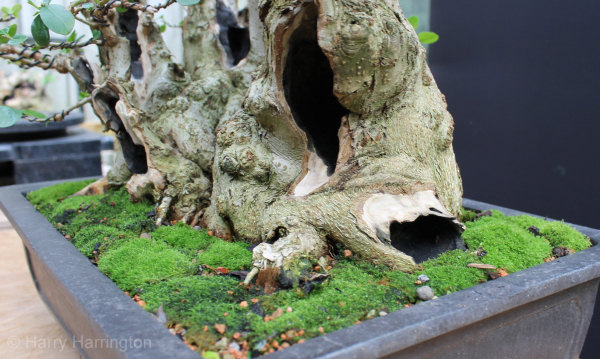
May 2013: A view of the back of the Privet multi-trunk reveals further, how I had ‘carved taper’ into the previously straight trunks, by creating shari/deadwood features. In some cases, only a fraction of the circumference of the trunk remained, in my effort to create taper.
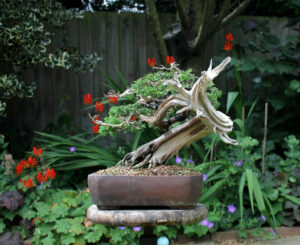
October 2013: With a heavy feeding and watering regime, the Privet multi-trunk bonsai thrived throughout the growing season of 2013. By October of that year I decided to invest the time into finishing the tree, with a view to replanting it into a handmade pot during the Spring of 2014.
Several areas of the trunk required dressing to cover up old scars or simply to break up otherwise ‘open’ or blank areas of the bonsai. The carving I carried out had been greatly simplified by limiting it to just three tones; black (the hollowed out wood), white (the bare wood below the cambium layer) and the bark itself.
The branches of the bonsai were then pruned, wired and placed.
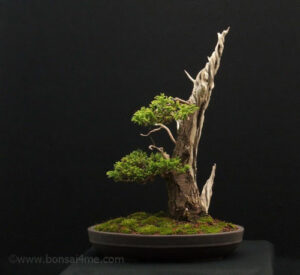
Privet bonsai multi-trunk (Ligustrum ovalifolium). February 2012 (top images) to October 2013.
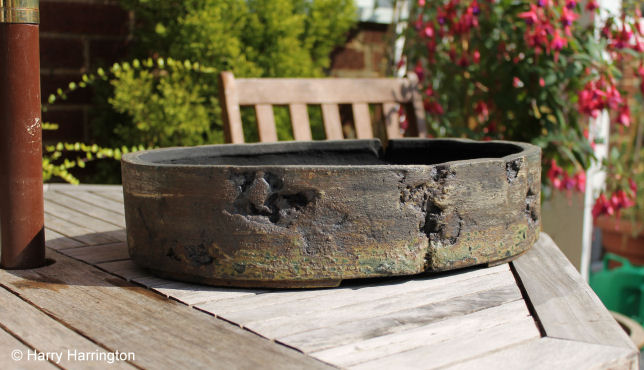
July 2014: During July 2014 I received a new handmade bonsai pot for the Privet from Victor Harris of Erin Bonsai. As the new pot had the same dimensions as the existing training pot that the tree was growing in, the Privet could be ‘slip-potted’ into its new home without disturbing the roots.
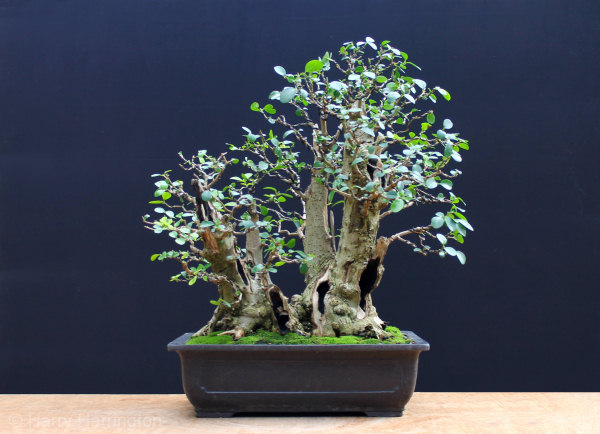
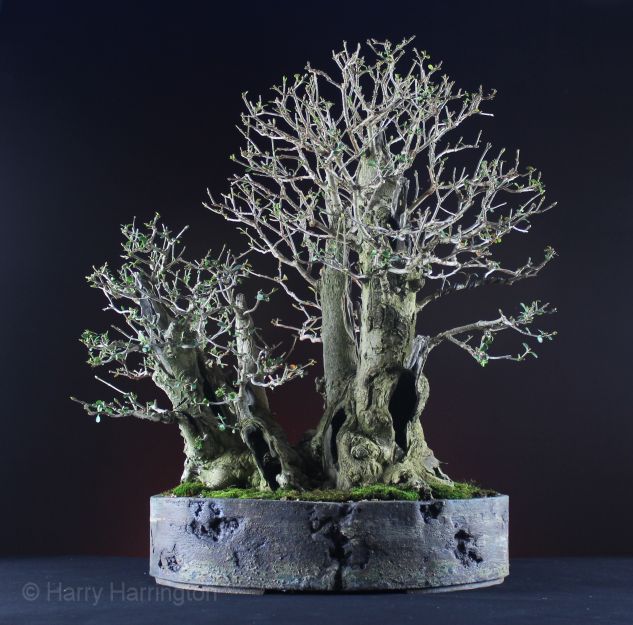
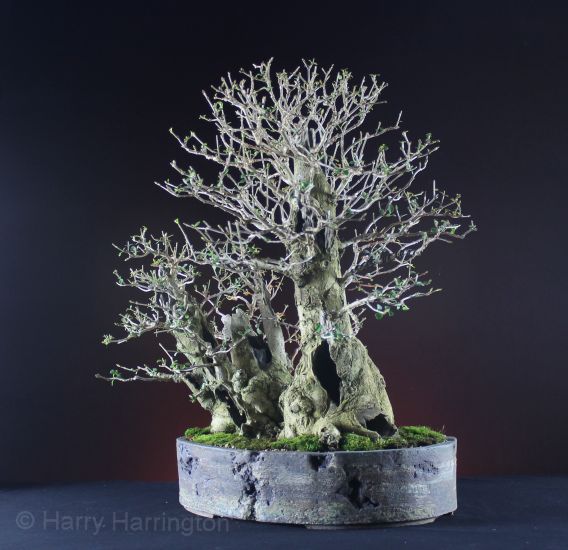
March 2015. During the Winter of 2014-2015, after the first heavy frosts began to remove the leaves from the tree, the Privet was fully defoliated and rephotographed. With the tree laid bare, the trunks and the entire branch structure could be examined and adjusted with pruning and wiring.
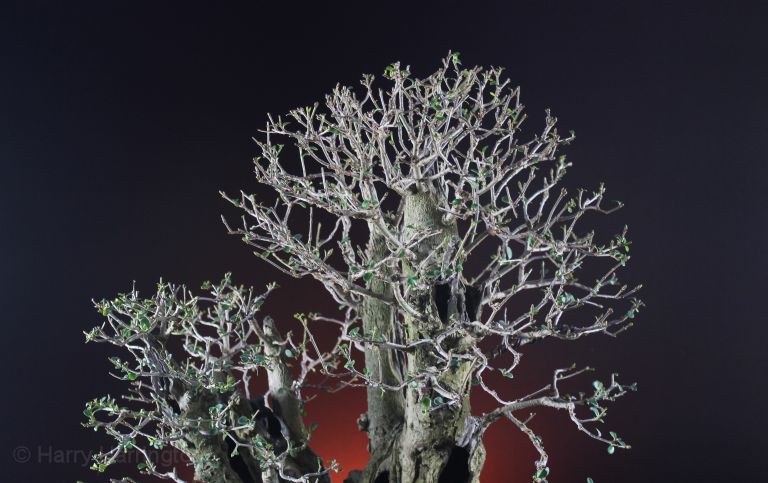
The Privet clump-bonsai as seen from the front. Ramification of the branches has greatly increased in just a few short years thanks to a regime of heavy feeding, pruning and defoliation.
Detail of the crown of the main trunks on the right, and the smaller trunks on the left.
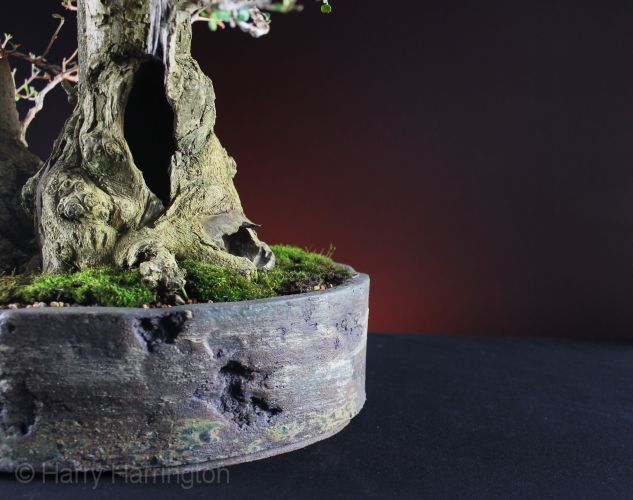
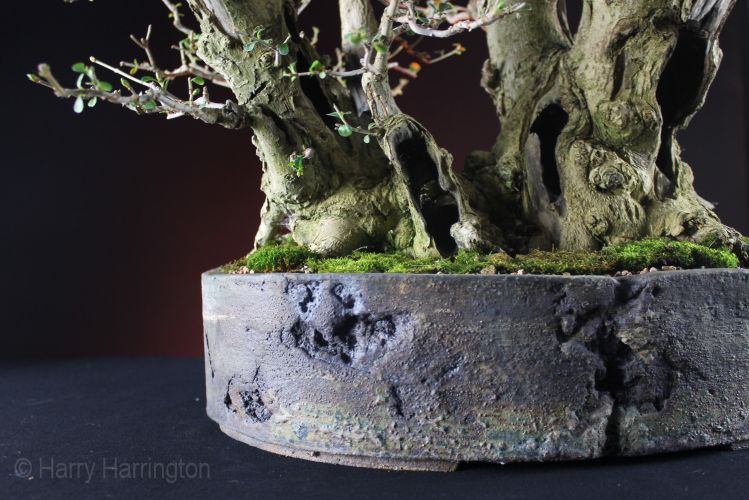
Detail of the bonsai pot by Erin Pottery and the right hand side of the trunk base.
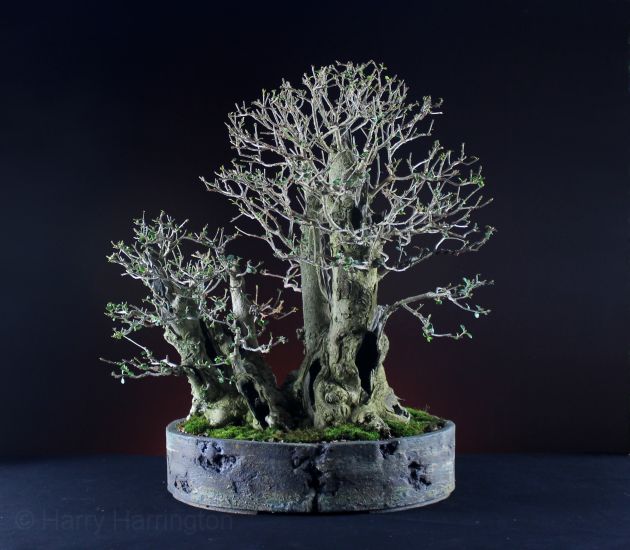
And the entire tree seen from the front-right view.
Detail of the smallest trunk on the left hand side of the tree, this particular trunk is entirely hollow.